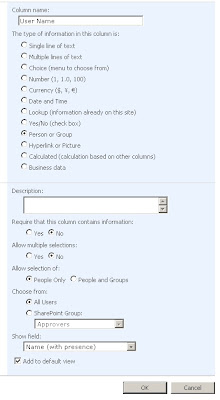
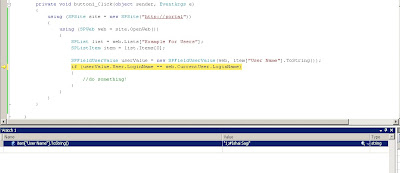
SPList 또는 SPListItem 개체에서 특정 사용자의 특정 권한을 체크해야 할 때가 있다.
금일 특정 권한 체크를 어떻게 해야 하냐는 질문에 바로 대답이 나오지 않아 난감했었다.

무엇을 묻는지도, 무엇을 대답해야 하는지도 아는데,
"DoesUserHavePermissions" 라는 메소드명이 기억나지 않아.
D로 시작하는 권한 체크하는 메소드 있는데 라고만 대답했을 뿐...ㅋㅋ

MOSS 개발 안한지도 4개월쯤 되가나~ 자주 안하니깐 까먹게 되는거 같다.ㅋㅋ
필자도 사람이기에 자주 사용안하는 건 까먹는다. (냠냠~)
그래서 이번 계기로 복습한다 생각에 정리를 해볼까 한다. (누구나 아는 거겠지만)

SPList
개체에서 특정 사용자의 특정 권한을 체크하고 싶을 때 사용하는 방법이다.

아래 소스는 기존에 사용하였던 방식이다.
//특정 그룹에 사용자가 있는지 체크하여 권한 체크
SPList spList = SPContext.Current.Web.GetList(".....");   //List URL
SPGroup spGroup = SPContext.Current.Web.Groups["....."];   //그룹명
if( spGroup.ContainsCurrentUser == true )
{
       // SPList에 글쓰기가 있으니.. 쓰는 권한에 관련된 처리를 여기에..
       ......
}

위 방식을 사용하기 위해서는 특정 그룹을 찾아야 한다는 문제가 있다. 이에 간단하게 해결되는 방법이 있다.

SPList spList = SPContext.Current.Web.GetList(".....");  //List URL

//리스트에 아이템 추가 권한 즉 쓰기 권한이 있는지 체크
if(spList.DoesUserHavePermissions(SPBasePermissions.AddListItems))
{
      // SPList에 글쓰기가 있으니.. 쓰는 권한에 관련된 처리를 여기에..
      ......
}
만일에 여러 권한을 체크해야 할 경우가 있을 것이다. 그럴 경우에는 DoesUserHavePermissions 메소드 안에 SPBasePermissions 항목을 '|' 구분하여 체크하면 된다.
if(splist.DoesUserHavePermissions(SPBasePermissions.AddListItems |
    SPBasePermissions.EditListItems))
{
      ......
}

    WCF 서비스를 이용한 Silverlight 구현 소스 참고

ü  Sharepoint 서버에 구현하였던 WCF서비스 파일 배포

1.     WCF 서비스 가상 디렉토리 생성하여 해당 디렉토리에 WCF 서비스 전담으로 만들었던 웹사이트 프로젝트의 파일을 아래 그림과 같이 배포합니다.


 -   Bin 폴더에 dll파일 배포 하지 않고, GAC에 등록하여 svc파일 상단에 아래에 음영 부분을 추가시켜 주시면 됩니다.

Code

Service.svc

<%@ Assembly Name="WCFServiceLibrary, Version=1.0.0.0, Culture=neutral, PublicKeyToken=f1a7a4b23352b442"%>

<%@ ServiceHost Debug="true" Language="C#" Service="WCFServiceLibrary.ProductService" %>


2.     생성한 가상디렉토리는 익명 액세스 가능하게 체크합니다.


3.     Service.svc 파일을 선택한 후, 마우스 오른쪽 버튼을 클릭하여 웹 페이지로 보기항목을 선택하여 웹 페이지를 보면 Sharepoint 웹사이트에서는 VirtualPath에 관련된 아래와 같은 에러 화면을 볼 수 있습니다.

4.     VirtualPath 해결 방안 (관련 링크)

-     클래스 라이브러리 프로젝트를 만듭니다.

-   자동으로 생성된 Class1.cs파일은 삭제하고 System.Web.dll을 참조시킵니다.

  아래 두 클래스를 추가하여 줍니다.

Code

WCFPatchupModule.cs

public class WCFPatchupModule : IHttpModule

{

    private static bool virtualPathProviderInitialized;

    private static readonly object virtualPathProviderInitializedSyncLock = new object();


    public void Dispose()

    {

    }


    public void Init(HttpApplication context)

    {

        if (!virtualPathProviderInitialized)

        {

            lock (virtualPathProviderInitializedSyncLock)

            {

                if (!virtualPathProviderInitialized)

                {

                    WCFVirtualPathProvider virtualPathProvider = new WCFVirtualPathProvider();

                    HostingEnvironment.RegisterVirtualPathProvider(virtualPathProvider);

                    virtualPathProviderInitialized = true;

                }

            }

        }

    }

}


WCFVirtualPathProvider.cs

public class WCFVirtualPathProvider : System.Web.Hosting.VirtualPathProvider

{

    public override string CombineVirtualPaths(string basePath, string relativePath)

    {

        return base.Previous.CombineVirtualPaths(basePath, relativePath);

    }


    public override ObjRef CreateObjRef(Type requestedType)

    {

        return base.Previous.CreateObjRef(requestedType);

    }


    public override bool FileExists(string virtualPath)

    {

        string str = virtualPath;

        if (virtualPath.StartsWith("~", StringComparison.Ordinal) && virtualPath.EndsWith(".svc", StringComparison.InvariantCultureIgnoreCase))

        {

            str = virtualPath.Remove(0, 1);

        }

        return base.Previous.FileExists(str);

    }


    public override CacheDependency GetCacheDependency(string virtualPath, IEnumerable virtualPathDependencies, DateTime utcStart)

    {

        return base.Previous.GetCacheDependency(virtualPath, virtualPathDependencies, utcStart);

    }


    public override string GetCacheKey(string virtualPath)

    {

        return base.Previous.GetCacheKey(virtualPath);

    }


    public override VirtualDirectory GetDirectory(string virtualDir)

    {

        return base.Previous.GetDirectory(virtualDir);

    }


    public override VirtualFile GetFile(string virtualPath)

    {

        return base.Previous.GetFile(virtualPath);

    }


    public override string GetFileHash(string virtualPath, IEnumerable virtualPathDependencies)

    {

        return base.Previous.GetFileHash(virtualPath, virtualPathDependencies);

    }

}

-     어셈블리 서명을 추가해주고, 해당 어셈블리 파일을 GAC에 등록합니다.

-     해당 웹사이트의 Web.Config 파일을 보면, <httpModules>세션에 음영된 부분을 추가합니다

Code

Web.Confing

<httpModules>

  <clear />

  <add name="SPRequest" type="Microsoft.SharePoint.ApplicationRuntime.SPRequestModule, Microsoft.SharePoint, Version=12.0.0.0, Culture=neutral, PublicKeyToken=71e9bce111e9429c" />

  <add name="OutputCache" type="System.Web.Caching.OutputCacheModule" />

  <add name="FormsAuthentication" type="System.Web.Security.FormsAuthenticationModule" />

  <add name="UrlAuthorization" type="System.Web.Security.UrlAuthorizationModule" />

  <add name="WindowsAuthentication" type="System.Web.Security.WindowsAuthenticationModule" />

  <add name="RoleManager" type="System.Web.Security.RoleManagerModule" />

  <!-- <add name="Session" type="System.Web.SessionState.SessionStateModule"/> -->

  <add name="PublishingHttpModule" type="Microsoft.SharePoint.Publishing.PublishingHttpModule, Microsoft.SharePoint.Publishing, Version=12.0.0.0, Culture=neutral, PublicKeyToken=71e9bce111e9429c" />

  <!-- Ajax & SIlverlight -->

  <add name="Session" type="System.Web.SessionState.SessionStateModule" />

  <add name="ScriptModule" type="System.Web.Handlers.ScriptModule, System.Web.Extensions, Version=3.5.0.0, Culture=neutral, PublicKeyToken=31BF3856AD364E35" />

  <add name="WCFVirtualPathProvider" type="WCFVirtualPathProvider.WCFPatchupModule, WCFVirtualPathProvider, Version=1.0.0.0, Culture=neutral, PublicKeyToken=2bea20c5375d001d"/>

</httpModules>

-   Service.svc 파일을 웹 브라우저로 열어 서비스가 정상 작동하지는 확인합니다.

ü  Silverlight 응용 프로그램 프로젝트 수정하기

1.     기존에 만든 Silverlight 프로젝트를 열어 참조된 서비스를 클릭하고 서비스 참조 구성이라는 항목을 선택합니다.

2.    클라이언트 주소가 나오는데 배포한 WCF 서비스 URL로 변경합니다. 업데이트 진행 상태가 나타나며, 문제가 없으면 업데이트가 완료됩니다.

ü  Sharepoint Silverlight WebPart 만들기

1.  Sharepoint 웹파트 추가 하는 종류

-   IIS Silverlight 전담 웹사이트를 만들고 배포한 후 Sharepoint의 기본 웹파트 중에 하나인 페이지 뷰어 웹파트를 이용하여 실버라이트를 보여주는 방법이 있습니다.

-   System.Web.UI.SilverlightControls.Silverlight 컨트롤을 사용하여 웹파트 클래스를 만드는 방법이 있습니다.

2.  우선 여기서는 Silverlight 컨트롤을 이용하여 웹파트를 추가하도록 하겠습니다. 새 프로젝트 추가합니다. (프로젝트 형식은 클래스 라이브러리을 선택합니다.)

-   실버라이트 응용 프로그램 빌드 후, xap 파일을 _layouts의 특정 폴더 배포합니다. )다른 방법으로는 문서 라이브러리 등에 배포 하셔도 상관없습니다.)

-  Silverlight 웹파트 클래스 만들기

Code

DemoSilverlight.cs

using System;

using System.Web.UI;

using System.Web.UI.WebControls;

using Microsoft.SharePoint;


namespace SilverlightWebParts

{

    public class DemoSilverlight : Microsoft.SharePoint.WebPartPages.WebPart

    {

        protected override void OnLoad(EventArgs e)

        {

            base.OnLoad(e);


            ScriptManager sm = ScriptManager.GetCurrent(this.Page);

            if (sm == null)

            {

                sm = new ScriptManager();

                Controls.AddAt(0, sm);

            }

        }


        protected override void CreateChildControls()

        {

            base.CreateChildControls();


            System.Web.UI.SilverlightControls.Silverlight ctrlSilverlight = new System.Web.UI.SilverlightControls.Silverlight();

            ctrlSilverlight.ID = "SilverlightControl";

            ctrlSilverlight.Source = SPContext.Current.Web.Url + "/_layouts/Silverlight/SilverlightApplication.xap";

            ctrlSilverlight.Width = new Unit(600);

            ctrlSilverlight.Height = new Unit(400);


            this.Controls.Add(ctrlSilverlight);

        }

    }

}

Description

ð  로드 이벤트(OnLoad 이벤트)에 보시면 ScriptManager 라는 컨트롤이 추가되어 있는데, 반드시 추가하여야 합니다. 클래스 안에 추가하는 방법 말고, 마스터 페이지 상단에 <asp:ScriptManager ID=”ScriptManager1” ></asp:ScriptManager>라고 추가하셔도 됩니다.

ð Silverlight 컨트롤에 많은 속성들이 있는데 그 중에 Source를 보시면 xap파일(Silverlight 패키지 파일)을 배포한 URL 주소가 들어 있습니다.

3.    해당 dll 파일을 GAC에 등록하시고, Sharepoint 웹파트 갤러리에 추가한 후, 원하는 화면에 웹파트를 추가하시면 아래와 같은 Silverlight 웹파트가 완성됩니다.

ü  Install .NET 3.5 Framework SP1 in Sharepoint Server

ü  Windows Sharepoint Service 3.0 SP1 & MOSS 2007 SP1

ü  GAC System.Web.Silverlight.dll 등록

1.    저장 폴더 위치

-       Microsoft Silverlight Tools for Visual Studio 2008 SP1 개발 환경이 구성되어 있거나 Silverlight 2 SDK 설치(링크)하면, C:\Program Files\Microsoft SDKs\Silverlight\v2.0\Libraries\Server 폴더 안에 System.Web.Silverlight.dll이 존재합니다.

ü  IIS MIME Type 정의

1.     인터넷 정보 서비스 관리 창을 뜨웁니다.

-       시작 실행에서 inetmgr 명령어를 입력하여 실행하여 Silverlight 적용시킬 Sharepoint 웹사이트의 속성 창을 엽니다.

-       HTTP 헤더 탭을 선택한 후, MIME 형식 버튼을 클릭합니다.

-       MIME 형식 창이 나타나며, 새 형식 버튼을 클릭하여 확장명에 .xap, MIME 형식에 application/x-silverligth-app을 등록합니다.

=>

ü  Sharepoint 웹사이트 해당 포트에 대한 Web.Config 수정

-       Web.config (C:\Inetpub\wwwroot\wss\VirtualDirectories\포트번호)에 아래와 같이 음영 처리된 부분을 추가합니다.


A while back, I posted a how to on using the KeywordQuery class and it seemed to get pretty good response, so I figured I would post a follow up on how to use the FullTextSqlQuery class today.  It's actually pretty similar to using the KeywordQuery class but of course the syntax is different.  I am not going to give you a full run down of all the syntax, but I will provide enough to get you going. 

There are a number of reason to use the FullTextSqlQuery class.  Using a SQL Syntax query unlocks the full power of Enterprise Search that really isn't there out of the box.  With SQL Syntax, you can do wildcard searches, and make use of the powerful CONTAINS and FREETEXT predicates.  With the CONTAINS predicate, you can use the FORMSOF term to do inflectional (i.e.: go matches going, gone, went, etc.) or thesaurus searches.  Again, check the SDK as there is plenty of documentation about how to use all sorts of predicates.  Before, we look at all the code lets look at a couple of things on the query.

SELECT Title, Path, Color, Size, Quantity, Rank, Description, Size FROM SCOPE() WHERE "scope" = 'My Scope' AND CONTAINS(Description, 'ant*')

In a lot of ways this looks like a T-SQL query.  Enterprise Search queries however always query from SCOPE().  To specify the actual scope (or scopes) you want to search on you use the where clause.  I have always found the syntax weird here because the word scope has to be in quotes and what you are comparing it to always has to be in single quotes.  In this case I am using the CONTAINS predicate to do a wildcard search.  It should return anything that has a word starting with ant in the description column (i.e.: ant, ants, anthony, antler, etc.).

Here is the complete code example.

using (SPSite siteCollection = new SPSite(siteCollectionUrl))

{

    // create a new FullTextSqlQuery class - use property intializers to set query

    FullTextSqlQuery myQuery = new FullTextSqlQuery(siteCollection)

    {

        QueryText = "SELECT Title, Path, Color, Size, Quantity, Description, Rank, Size FROM SCOPE() WHERE \"scope\" = 'My Scope' AND CONTAINS(Color, 'ant*')",

        ResultTypes = ResultType.RelevantResults

    };


    // execute the query and load the results into a datatable

    ResultTableCollection queryResults = myQuery.Execute();

    ResultTable queryResultsTable = queryResults[ResultType.RelevantResults];

    DataTable queryDataTable = new DataTable();

    queryDataTable.Load(queryResultsTable, LoadOption.OverwriteChanges);

}


If you read this blog you probably know that besides the web user interface, SharePoint also exposes some interfaces which you can use from code: the SharePoint object model and the SharePoint web services. The object model of SharePoint can only be used by code/applications that are running on a SharePoint server in your Server Farm, so you can’t use the object model on client machines. The SharePoint web services can be used of course across a network boundary, that’s what they are built for! In this post I’m going to show you how you can access the out-of-the-box SharePoint web services by making use of the jQuery Javascript library. First let’s see what you can do with this technique: download this zip file that contains an ASPX page (a basic Site Page without any code behind), and the jQuery Javascript library (in case you don’t have it already). Upload the two individual files (not the zip file) in the root of a Document Library in any of your SharePoint sites. You can do this by making use of the web user interface; you don’t have to touch anything on the server itself. When done, just click on the link of the uploaded ASPX and you’ll see following page:


Probably you’re not really impressed but think about the fact that this page is just an ASPX file you’ve uploaded through the web user interface, there is absolutely no code behind involved (which would have been blocked by SharePoint’s default security settings). The details of the SharePoint lists are loaded by making use of Javascript code that calls the web SharePoint lists.asmx web service.

So how do you call a SharePoint web service in Javascript code; well you can use the XmlHttpRequest object and write lots of boring code, or you can make use of a Javascript library that wraps this XmlHttpRequest object and exposes a nice and easy interface. In this demo I’ll use the jQuery Javascript library, so the first thing that you’ll need to do is to make sure the page is loading that library:

<script type="text/javascript" src="jquery-1.3.2.min.js" mce_src="jquery-1.3.2.min.js"></script>

If you already configured your SharePoint site so the jQuery library is loaded (for example by making use of the SmartTools.jQuery component), you can skip this line of course. 

When the page is loaded, the Lists web service (e.g. http://yoursite/_vti_bin/lists.asmx) of SharePoint needs to be called; this can be accomplished by making use of the jQuery’s ajax method. This method can post the necessary SOAP envelope message to the Lists web service. The XML of the SOAP envelope can easily be copied from the .NET web service test form of the desired web method (e.g. http://yoursite/_vti_bin/lists.asmx?op=GetListCollection). In the code below, a call to the GetListCollection web method is made when the page is loaded. The complete parameter of the ajax method is actually a pointer to another Javascript function (which we’ll implement later on) that will be called asynchronously when the web service call is done.  Don’t forget to update the url parameter with your SharePoint site’s URL!

$(document).ready(function() {
    var soapEnv =
        "<soapenv:Envelope xmlns:soapenv='http://schemas.xmlsoap.org/soap/envelope/'> \
            <soapenv:Body> \
                <GetListCollection xmlns='http://schemas.microsoft.com/sharepoint/soap/'> \
                </GetListCollection> \
            </soapenv:Body> \
        </soapenv:Envelope>";

    $.ajax({
        url: "
http://yoursite/_vti_bin/lists.asmx",
        type: "POST",
        dataType: "xml",
        data: soapEnv,
        complete: processResult,
        contentType: "text/xml; charset=\"utf-8\""
    });
});

As I already mentioned, the processResult function is called when the response XML of the web service call is received. In this method a loop is created which will iterate over every List element of the response XML. For every List element a <li></li> element is added to the element with the ID attribute set to data.

function processResult(xData, status) {
    $(xData.responseXML).find("List").each(function() {
        $("#data").append("<li>" + $(this).attr("Title") + "</li>");
    });
}

This data element is the actual <ul></ul> list in HTML:

<ul id="data"></ul>

When you put everything together in a Site Page, this is the result:


In the zip file mentioned in the beginning of this post, you can find an extended version of the processResult function which will display some additional metadata for every list (like the ID, ItemCount etc). The entire contents of basic version of the Site Page built in this post goes as follows:

<%@ Page Language="C#" MasterPageFile="~masterurl/default.master" %>

<asp:Content runat="server" ContentPlaceHolderID="PlaceHolderAdditionalPageHead">

    <script type="text/javascript" src="jquery-1.3.2.min.js" mce_src="jquery-1.3.2.min.js"></script>

    <script type="text/javascript">
        $(document).ready(function() {
            var soapEnv =
                "<soapenv:Envelope xmlns:soapenv='http://schemas.xmlsoap.org/soap/envelope/'> \
                    <soapenv:Body> \
                        <GetListCollection xmlns='http://schemas.microsoft.com/sharepoint/soap/'> \
                        </GetListCollection> \
                    </soapenv:Body> \
                </soapenv:Envelope>";

            $.ajax({
                url: "
http://yoursite/_vti_bin/lists.asmx",
                type: "POST",
                dataType: "xml",
                data: soapEnv,
                complete: processResult,
                contentType: "text/xml; charset=\"utf-8\""
            });

        });

        function processResult(xData, status) {
            $(xData.responseXML).find("List").each(function() {
                $("#data").append("<li>" + $(this).attr("Title") + "</li>");
            });
        }
    </script>

</asp:Content>
<asp:Content runat="server" ContentPlaceHolderID="PlaceHolderMain">
    <ul id="data"></ul>
</asp:Content>
<asp:Content runat="server" ContentPlaceHolderID="PlaceHolderPageTitleInTitleArea">
    List Details
</asp:Content>
<asp:Content runat="server" ContentPlaceHolderID="PlaceHolderPageTitle">
    List Details
</asp:Content>

You can add a web reference to each SharePoint web service through your Visual Studio .NET IDE. In your Solution Explorer right click on your project and select "Add Web Reference" from your popup menu. The table below shows the URLs to use for each web service provided by WSS. Enter the URL to the web service and click the Go button. This will show you in the dialog box a summary of all available web methods. Next enter the name of the web reference and then click Add Reference.

WSS Web Services

Web Reference

Administration Service

http:///_vti_adm/admin.asmx

Alerts Service

http:///_vti_bin/alerts.asmx>

Document Workspace Service

http:///_vti_bin/dws.asmx>

Forms Service

http:///_vti_bin/forms.asmx>

Imaging Service

http:///_vti_bin/imaging.asmx>

List Data Retrieval Service

http:// /_vti_bin/dspsts.asmx>

Lists Service

 http:///_ vti_bin/lists.asmx>

Meetings Service

http:/// _vti_bin/meetings.asmx>

Permissions Service

http:// /_vti_bin/permissions.asmx>

Site Data Service

http:///_vti_bin/sitedata.asmx>

Site Service

http:///_vti_bin/sites.asmx>

Users and Groups Service

http:///_vti_bin/usergroup.asmx>

Versions Service

http:///_vti_bin/versions.asmx>

Views Service

http:///_vti_bin/views.asmx>

Web Part Pages Service

http:// /_vti_bin/webpartpages.asmx>

Webs Service

http:///_vti_bin/webs.asmx>

Setting the web service user credentials

The SharePoint web services only accept calls from existing SharePoint users and do also enforce access security. Import the System.Net namespace into your project and then use the NetworkCredential class to set the user credential to use for the web service call. Here is a code snippet:

public
static XmlNode VersionsGetVersions(string SharePointHost, string UserName, string Password, string Domain, string FileName)
{
// proxy object to call the Versions web service
Versions.Versions VersionsService = new Versions.Versions();
// the user credentials to use
VersionsService.Credentials = new NetworkCredential(UserName, Password, Domain);
VersionsService.Url = SharePointHost + "_vti_bin/Versions.asmx";
// gets the file versions
XmlNode Result = VersionsService.GetVersions(FileName);
// dispose the web service object
VersionsService.Dispose();
return Result;
}

For example, first you create an instance of the Versions web service. Then you assign a new instance of the NetworkCredential class to the Credentials property on the created web service object. We pass along the user name, password and the user's domain name to the NetworkCredential object. Next you set the web service URL, which might very well be different from the one used when you created the web reference. Finally you invoke the desired web method, in the code snippet above the GetVersions() web method. The web method takes a file name and returns a XML document with all available versions of this file (Document libraries can have versioning enabled and then keep a history for each version). At the end you call Dispose() on the web service object to free up any underlying unmanaged resources.

If the user does not exist in SharePoint or does not have the permission to perform the operation then a WebException is thrown by SharePoint. The returned HTTP status is 401, which means unauthorized request. There are some inconsistencies across all web services. For example some web methods take a XML string as input while others take an XmlNode as input. Most web methods return the result as XmlNode while others return a XML string and while others again return complex data structures. But after you get used to these inconsistencies it is very easy to use these web services and integrate SharePoint capabilities right into your application.

A summary of the "Windows SharePoint Services" web services

The following table provides an overview what capabilities are exposed through the "Windows SharePoint Services" web services. Each web service is targeted towards a specific area although there is some overlap. You for example can use the Lists web service and the Site Data web service to work with SharePoint lists, or you can use the Site Data web service and the Webs web service to work with sites meta-data and sub-sites. Please refer to the attached "SharePoint web service browser" sample application which provides a windows form interface to browse all web services and all its web methods. It enables you to play with each web method or web service and better understand its usage. It also displays to each web service and web method the detailed SDK help page.

WSS Web Services

Description

Administration Service

This web service provides administrative capabilities like creating a new top-level site, deleting a top-level site and getting the list of available languages.

Alerts Service

Provides access to the list of active alerts and allows to delete active alerts.

Document Workspace Service

This web service is used to manage Document Workspace sites. It allows to create new document workspaces, delete document workspaces, create new sub-folders, delete sub-folders, etc.

Forms Service

Each list has forms associated which are used to display list items, create new list items and update or delete existing list items. This web service allows to get the collection of forms associated with a list and then get detailed information about each form.

Imaging Service

SharePoint has picture libraries which users can use to manage pictures. This web service allows to upload pictures, download pictures, create new folders, delete folders and pictures, etc.

List Data Retrieval Service

Allows to run XPath like queries against a list.

Lists Service

This web service is used to work with lists and list data. You can obtain the collection of lists, add new lists, remove lists, add new list attachments, remove attachments, etc.

Meetings Service

This web service is used to work with Meeting Workspaces. You can create a new Meeting workspace, remove an existing Meeting workspace, add new meetings, add new meetings using ICal files, etc.

Permissions Service

Sites and lists have permissions assigned to them. This web service is used to obtain the permissions assigned to a list or site, add new permissions and update or removing existing permissions.

Site Data Service

The Site Data web service can be used to return meta-data about a site or list, get the collection of lists, get the attachments for a list item, get the collection of items in a list, etc.

Site Service

This web service can be used to return the list of site templates. When you create a new site using the Administration web service you need to specify the site template name to use which you can obtain through this web service.

Users and Groups Service

This web service is used to work with users, site-groups and cross-site groups. You can add, update or remove users, site-groups and cross-site groups. You can also add users or cross-site-groups to a site-group.

Versions Service

Document Libraries and Picture Libraries can have versioning enabled, which stores a copy of every single file version. This web service can be used to get the list of available versions, delete versions and also restore a file version.

Views Service

Lists have views associated which define what fields are shown, what filtering and sorting is applied, what grouping is applied, etc. This web service is used to work with list views. You can get the collection of views, add new views, remove views, update the Html code used to display a view, etc.

Web Part Pages Service

Web Parts are objects which you can place on web part pages. This web service is used to work with web parts and web part pages. You can get the list of web parts on a page, you can add or remove web parts, etc.

Webs Service

This web service is used to work with sites and sub-sites. You can get the list of list-templates, get meta-data about a sub-site, get the list of sub-sites, etc.

A summary of the SharePoint Portal Server web services

SharePoint Portal Server provides the same web services as Windows SharePoint Services. It also provides the following five additional web services.

WSS Web Services

Description

Area Service

Areas are sections used in SharePoint Portal Server to group content. This web service allows to manage areas. You can create new areas, update areas, remove areas, get the list of sub-areas, etc.

Query Service

The Query web service is used by clients to search SharePoint. You can send in complex search XML requests and get a result-set of matches.

User Profile Service

Users in SPS have user profiles that are used to target content to audiences (users). This web service allows to obtain user profile information. It does not allow to create or modify user profiles.

SPS Crawl Service

This web service is undocumented and is used by SharePoint itself for site crawling purposes.

Outlook Adapter Service

Provides the same capabilities as the Alerts web service of WSS.


The table below shows the URLs to use for each web service provided by SharePoint Portal Server. You can add them the same way as the WSS web services described above.

WSS Web Services

Web Reference

Area Service

http:///_vti_bin/areaservice.asmx>

Query Service

http:///_vti_bin/search.asmx>

User Profile Service

http:// /_vti_bin/userprofileservice.asmx

SPS Crawl Service

http:///_vti_bin/spscrawl.asmx>

Outlook Adapter Service

http:// /_vti_bin/outlookadapter.asmxd>

Namespaces used in the returned SharePoint XML documents

Many of the web methods return its result in form of an XML document. Most root nodes have a namespace URI associated with it. Here is an example XML document returned by the GetListCollection() web method (on the Lists web service). Please note that this is just a partial XML snippet for demonstration purpose:

Naturally we would think of running an XPath query like "//List" using the SelectNodes() method on the XmlDocument or XmlNode object. We expect it to return all the List nodes of this XML document. But the result returned is empty. The reason being that you need to query within the namespace associated with the root node. But how do you do that if there is no namespace qualifier (or prefix) associated with the namespace URI. We need to use the XmlNamespaceManager class to associate a namespace prefix to the namespace URI. Here is the code snippet:

private XmlNodeList RunXPathQuery(XmlNode XmlNodeToQuery, string XPathQuery) {
// load the complete XML node and all its child nodes into a XML document XmlDocument Document = new XmlDocument();
Document.LoadXml(XmlNodeToQuery.OuterXml);
// all the possible namespaces used by SharePoint and a randomly choosen prefix
const
string SharePointNamespacePrefix = "sp";
const string SharePointNamespaceURI = http://schemas.microsoft.com/sharepoint/soap/";
const string ListItemsNamespacePrefix = "z";
const string ListItemsNamespaceURI = "#RowsetSchema";
const string PictureLibrariesNamespacePrefix = "y";
const string PictureLibrariesNamespaceURI = http://schemas.microsoft.com/sharepoint/soap/ois/";
const string WebPartsNamespacePrefix = "w";
const string WebPartsNamespaceURI = http://schemas.microsoft.com/WebPart/v2;
const string DirectoryNamespacePrefix = "d";
const string DirectoryNamespaceURI = http://schemas.microsoft.com/sharepoint/soap/directory/;
// now associate with the xmlns namespaces (part of all XML nodes returned
// from SharePoint) a namespace prefix which we can then use in the queries

XmlNamespaceManager NamespaceMngr = new XmlNamespaceManager(Document.NameTable); NamespaceMngr.AddNamespace(SharePointNamespacePrefix, SharePointNamespaceURI); NamespaceMngr.AddNamespace(ListItemsNamespacePrefix, ListItemsNamespaceURI); NamespaceMngr.AddNamespace(PictureLibrariesNamespacePrefix, PictureLibrariesNamespaceURI); NamespaceMngr.AddNamespace(WebPartsNamespacePrefix, WebPartsNamespaceURI); NamespaceMngr.AddNamespace(DirectoryNamespacePrefix, DirectoryNamespaceURI);
// run the XPath query and return the result nodes
return Document.SelectNodes(XPathQuery, NamespaceMngr);
}

First we create a new XmlDocument object and load the XML string of the passed along XmlNode into it. This way we can manipulate the XML document as needed without affecting the original XmlNode object itself. Then we create an XmlNamespaceManger object and assign it to the XmlDocument object. This we do by passing along the NameTable property of the XmlDocument. Next we add all the namespace URI's with its namespace prefixes. There are five different namespaces you will run into frequently (see declared constants). Finally we run the XPath query and return the collection of matching XML nodes. The namespace shown in our sample XML snippet gets the "sp" namespace prefix associated so our XPath query would change to "//sp:List". This will now return all matching XML nodes.

Some real life examples of using the SharePoint web services

The following examples demonstrate how you can leverage the SharePoint web services to interact tightly with SharePoint from within your application. The detailed code for each example can be found in the attached "SharePoint explorer" sample application. The description below explains which web service and web method to use to obtain the desired SharePoint information.

Example 1 - Get the collection of SharePoint lists, fields and views

In the first example we want to get the collection of SharePoint lists. For each list we want to get all the defined list fields (fields you can use to store information) and finally all views associated with the list. Here are the web methods to call:

  • On the Lists web service call the GetListCollection() web method to get the collection of all SharePoint lists. This returns an XML document with all SharePoint lists.
  • Next you run the "//sp:List" XPath query to get all matching List nodes. The Title attribute of each matching node contains the name of the SharePoint list.
  • For each SharePoint list we call the GetList() web method on the Lists web service, passing along the list name. This returns a XML document with detailed information about the list including the list of fields.
  • Next you run the "//sp:Field" XPath query to get all the matching Field nodes. The Name attribute contains the field name.
  • For each SharePoint list we call the GetViewCollction() web method on the Views web service, passing along again the list name. This returns a XML document listing all views for the list.
  • Finally you run the "//sp:View" XPath query to get all the matching View nodes. The Name attribute contains the name of the view.

Example 2 - Get the list of users and site-groups

In this example we want to get the list of site users and to which site group each user belongs. We also want to get the list of site groups and which users belong to each site group.

  • On the Users-and-Groups web service we call the GetUserCollectionFromWeb() web method. This returns an XML document with all the site users.
  • Next you run the "//d:User" XPath query to get all the matching User nodes. The Name attribute contains the user name and the LoginName attribute the user's login name.
  • For each user we call the GetRoleCollectionFromUser() web method on the Users-and-Groups web service passing along the user's login name. This returns a XML document with all the site groups the user belongs to.
  • Next you run the "//d:Role" XPath query to get all the matching Role nodes. The Name attribute contains the site group name.
  • To get the list of site groups call the GetRoleCollectionFromWeb() web method on the Users-and-Groups web service. This returns an XML document with all site groups.
  • Next you run again the "//d:Role" XPath query to get all the matching Role nodes. The Name attribute contains the site group name.
  • Finally call for each site group the GetUserCollectionFromRole() web method on the Users-and-Groups web service passing along the site group name. This returns an XML document with all the users belonging to this site group.
  • Next you run again the "//d:User" XPath query to get all the matching User nodes. The Name attribute contains the user name and the LoginName attribute the user's login name.

Example 3 - Get the list of sites, site-templates and list-templates

With the last example we want to get a list of all sites in the site collection. We want to get for the site collection the list of site templates. Additionally we want for each site the list of list templates.

  • First we call the GetAllSubWebCollection() web method on the Webs web service. This returns an XML document with all sites in the site collection.
  • Next run the "//sp:Web" XPath query to return all matching Web nodes. The Url attribute contains the absolute URL for the site.
  • Then we call the GetSiteTemplates() web method on the Sites web service. This returns an array of available site templates in the site collection, which is an array of the type Sites.Templates. The attached sample application converts all structures to an XML document using reflection, so you can run XPath queries against it (see the method SharePoint.SitesGetSiteTemplates()).
  • Next run the "//SharePointServices.Sites.Templates" XPath query which returns all matching template nodes. The Title attribute contains the template title and the Name attribute the SharePoint template name.
  • For each site we call the GetListTemplates() web method on the Webs web service. Before calling the web service object you need to set the URL to the site URL (returned by GetAllSubWebCollection()). This way we make sure that t he call is to the site itself and returns the list templates of that site. This returns an XML document with all list templates.
  • To finish run the "//sp:SiteTemplate" XPath query to return all matching SiteTemplate nodes. The DisplayName attribute contains the name of the list template.

Summary

SharePoint comes with a vast number of web services and web methods which enable you to tightly integrate SharePoint capabilities into your application. It is very easy to learn and use these web services and web methods. Please refer to the attached "SharePoint web service browser" example which provides a complete wrapper class for all existing (about 150) web methods. This removes the burden of adding all the web references and worrying about the details how to instantiate each web method, etc. The sample application provides a user interface to explore all web methods. You can browse the web services and web methods, display the SDK help page, enter the input values, execute the web method and look at the displayed output values.

The second example - "SharePoint explorer" provides a much more comprehensive sample of how to use and work with the SharePoint web services and web methods. It retrieves as much information and displays the data in lists and tree nodes (always running simple XPath queries against the result-set). The user interface allows you to traverse through the related data. You can also write your own web services using the managed SharePoint server API. Here is a sample application which provides a document check-in and check-out capability through a new web service.


The Problem

When you had custom code to deploy in WSS v2, primarily Web Parts, you packaged them up in a Web Part Package using WPPackager for deployment on your servers. Unfortunately it wasn't the easiest tool to use, nor was it error-free. Thankfully Microsoft has abandoned the WPPackager utility in WSS v3 in favor solution files. A solution file is a Windows SharePoint Services solution package that is really just a CAB with a WSP extension. You can use solutions to deploy Web Parts & associated files (such as resource files, images, CSS, etc), add safe control entries, deploy the CAS policy changes, features, and so on… (read the documentation in the WSS SDK linked at the end of this post for more info).

The only downside is that building CAB files isn't the easiest or most straightforward thing to do. Visual Studio 2005 includes a setup project template that you can use to include another project's output, but it has two limitations… one very big one:

  1. It will only generate *.CAB files, even if you try to rename the settings, it will always generate a *.CAB file, but more importantly...
  2. It doesn't allow you to create subfolders in your *.WSP which localized deployments require.

Your other option is to get the Microsoft Cabinet SDK that includes the MakeCAB.EXE utility, craft a diamond directive file (*.DDF), and build the *.WSP that way. Yuck… there must be an easier way!

Overview

There is! With just a little work, you can configure your Visual Studio 2005 project, using MSBuild and MakeCAB.exe, to create the *.WSP file for you. Tony's post on how he did it to deploy a WSS v3 Feature shows one way to do this... I implemented a similar setup.

The process is actually quite simple. You'll create a new MSBuild targets file (basically an instruction file) that will execute the MakeCab.exe, passing in a DDF. You'll also need to create the DDF file that tells MakeCab.exe what it needs to build a CAB. Then you tell MSBuild that after it compiles the project, it needs to kick off the new targets file you created.

Prerequisite

You need to download and extract the Microsoft Cabinet SDK to your dev machine where you'll build this project. I extracted the contents of the SDK to c:\Program Files\Microsoft Cabinet SDK, but you can put yours anywhere you like (just make sure to make the appropriate changes to the custom targets file in step 5 below.

Modifying Visual Studio 2005 Projects to generate WSS v3 Solution Packages (*.WSP's)

In this article I'll walk through creating a simple feature that provisions a master page and preview image into the Master Page Gallery in a Publishing site. Steps 1-3 are nothing special… steps 4-6 utilizes the MakeCab.exe utility by leveraging MSBuild. It's these latter steps (4-6) that I consider customization steps… but it's only three steps!

Step 1 - Create a Visual Studio 2005 C# empty project

I'm not going to detail this step, here… all I've done is create a new Visual Studio 2005 project using the Empty Project template as shown in Figure 1.

VSEmptyProjectDialog
Figure 1 - Visual Studio 2005 Add Project Dialog

Step 2 - Add all files necessary for the feature

Nothing special here, just everything that you'll need for your feature. I just copy everything within the feature directory into the root of the project, then add them one by one to the project as existing items. You should how have a feature that looks like Figure 2.

SolutionWithFeature
Figure 2 - Project containing feature files

Step 3 - Add a Manifest.XML file to the project

When you deploy your solution it must contain a manifest.xml file detailing everything that's in the WSP file. Since my feature is quite simple, my manifest file is quite simple as well as shown in Figure 3:

ManifestXml
Figure 3 - Manifest.xml

Step 4 - Create a diamond directive file (*.DDF)

These are similar to *.INF files. DDF files are broken down into two parts: setting some variables and specifying the payload of the generated cabinet file. For all my DDF's, I use the same top part, up to the line of asterisks (a comment line). Next comes the payload.

Two things to note here: (1) files are relative to the current directory (the way I've set this up, it will always be the root of the project) and (2) when you want to create a subdirectory within the generated cabinet file, you need to set the DestinationDir variable. All files following that statement will be added to that subdirectory. Refer to Figure 4 to see the DDF file for our feature.

DDF
Figure 4 - SharePointFeaturePackage.ddf

Step 5 - Add custom MSBuild targets file

Now we need to create the instructions that we'll feed MSBuild to execute MakeCab.exe to generate our cabinet file. The first piece to this is in the opening node. It tells MSBuild the default target to run (which we'll define in a moment). Next, it creates a custom property called MakeCabPath which contains the path to the MakeCab.exe utility.

Now for the meat & potatoes: the custom MSBuild targets instructions. You'll see two nodes which will execute one command each when we build our project. The first one calls MakeCab.exe passing in three parameters:

  • DDF file: This is the instruction set for MakeCab.exe we created in the previous step. MakeCab.exe uses this to create the payload of the cabinet file.
  • CabinetNameTemplate: This tells MakeCab.exe what to name the output cabinet file. This isn't something you can do with Visual Studio's CAB Project template!
  • DiskDirectory1: This tells MakeCab.exe where to put the generated cabinet file.
Refer to Figure 5 for the custom targets file. A few things to note here:
  • I'm running MakeCab.exe a second time if you build using the Debug configuration (note the Condition attribute on line 13). This time, I build the cabinet but as a *.CAB file, not as a *.WSP file. Why? Because you can double-click into a *.CAB file in Windows Explorer to see its contents (good for debugging).
  • All output is saved to the $(OutputPath)SpPackage directory. This will result in a SpPackage folder being created in the bin\debug or bin\release folder depending on which Configuration you build under.

    Targets
    Figure 5 - SharePointFeaturePackage.Targets
    (don't include the wrapping of the Exec in your Targets file, I did it here for readability only)

Step 6 - Modify project file to import & call custom targets file after building the project

Finally, the last step is to configure your project file so that MSBuild will run our instructions in our custom targets file instead of the default instructions. To do this, you need to unload the project by right-clicking it in the Solution Explorer tool window and selecting Unload Project (refer to Figure 6). Now, right-click the project again in Solution Explorer and select Edit [project name].csproj. Make the following changes:

UnloadProject
Figure 6 - Unloading a project

  • Change the DefaultTargets attribute in the opening node from Build to SharePointFeaturePackage.
  • On (or about) line 31, change the node's Project attribute to SharePointFeaturePackage.Targets. This tells MSBuild to use our targets file, not the Csharp targets file (usually used for compiling).
Refer to Figure 7 for what your project file should look like. Save your changes, then right-click the project in the Solution Explorer window and select Reload Project (if prompted with a security warning, select Load project normally).

ProjectFile
Figure 7 - Customized project file (*.csproj)

That's it! Now build your solution. When you look in your \bin\debug\SpPackage directory, you'll see two files, a *.CAB and a *.WSP. Use STSADM.EXE to add the solution to the solution store using the following command at a prompt:
STSADM -o addsolution -filename ACsFileProvisioningFeature.wsp

With your solution added to the solution store, you now need to deploy it. You can do that from the command line, or by going to Central Administration, selecting the Operations tab, then Solution Management under the Global Configuration section. Select your solution then click Deploy Solution. Once it's deployed, you should see your feature in the [..]\12\TEMPLATE\FEATURES directory.

Finally, browse to a Publishing site, select Site Actions -> Site Settings -> Modify All Site Settings, then select Site Collection Features under the Site Collection Administration and click Activate for your feature (in my case, it's called File Provisioning Feature Sample 1) to provision the files. Check the Master Page Gallery (Site Actions -> Manage Content and Structure, then select Master Page Gallery) and you should see your custom master page in the list as shown in Figure 8. Very cool!

MasterPageGallery
Figure 8 - Provisioned File!

You can download the project I used in writing this article here: ACsFileProvisioningFeature.

Extras

테이블 형식으로 Header 정보 넣기 위해

스타일 라이브러리의 XSL Style Sheets 폴더에서 ContentQuerMain.xsl 파일과 ItemStyle.xsl 파일을 수정해야 합니다.

우선 해당 파일을 다운받습니다.


1.     ContentQueryMain.xsl 파일에 코드 추가

우선, <xsl:template name="OuterTemplate.CallItemTemplate"> 안에 아래 두가지의 코드를 캡쳐 이미지1과 같이 추가하시면 됩니다.


<xsl:param name="LastRow" />


<xsl:when test="@Style='CustomStyle'">

           <xsl:apply-templates select="." mode="itemstyle">

             <xsl:with-param name="CurPos" select="$CurPosition" />

             <xsl:with-param name="Last" select="$LastRow" />

           </xsl:apply-templates>

</xsl:when>


캡쳐 이미지1)

, <xsl:template name="OuterTemplate.Body">안에 <xsl:call-template name="OuterTemplate.CallItemTemplate"> 태그가 있는데,

그 안에도 아래 캡쳐 이미지2와 같이, <xsl:with-param name="LastRow" select="$LastRow"/> 태그를 추가합니다.


캡쳐 이미지2)


2.     ItemStyle.xsl 파일에 코드 추가

수정했던 부분을 삭제하시고 아래 코드를 추가하시면 됩니다.


<xsl:template name="CustomStyle" match="Row[@Style='CustomStyle']" mode="itemstyle">

    <xsl:param name="CurPos" />

    <xsl:param name="Last" />


    <xsl:variable name="SafeLinkUrl">

      <xsl:call-template name="OuterTemplate.GetSafeLink">

        <xsl:with-param name="UrlColumnName" select="'LinkUrl'"/>

      </xsl:call-template>

    </xsl:variable>

    <xsl:variable name="DisplayTitle">

      <xsl:call-template name="OuterTemplate.GetTitle">

        <xsl:with-param name="Title" select="@Title"/>

        <xsl:with-param name="UrlColumnName" select="'LinkUrl'"/>

      </xsl:call-template>

    </xsl:variable>

    <xsl:variable name="Rows" select="./@Title"/>

    <xsl:variable name="TableStart">

      <xsl:if test="$CurPos = 1">

        <![CDATA[

        <table width="100%" border="0" cellpadding="0" cellspacing="0" style="table-layout:fixed">

          <tr bgcolor="#f9f9f9">

            <td width="25%" style="padding:6px;"><b>제목</b></td>

            <td width="45%" style="padding:6px;"><b>설명</b></td>

            <td width="15%" align="center" style="padding:6px;"><b>수정한 사람</b></td>

            <td width="15%" align="right" style="padding:6px;"><b>수정한 날짜</b></td>

          </tr>  

        ]]>

      </xsl:if>

    </xsl:variable>

    <xsl:variable name="TableEnd">

      <xsl:if test="$CurPos = $Last">

        <![CDATA[ </table> ]]>

      </xsl:if>

    </xsl:variable>

    <xsl:value-of select="$TableStart" disable-output-escaping="yes"/>

    <tr>

        <td width="25%">

          <div id="linkitem" class="item link-item bullet">

            <nobr style="text-overflow:ellipsis;overflow-x:hidden;width:95%">

              <a href="{$SafeLinkUrl}" target="_blank" title="{@Title}">

                <xsl:value-of select="$DisplayTitle"/>

              </a>

            </nobr>

          </div>

        </td>

        <td width="45%" title="{@Description}">

          <nobr style="text-overflow:ellipsis;overflow-x:hidden;width:95%">

            <xsl:value-of select="@Description" />

          </nobr>

        </td>

        <td width="15%" align="center" title="{@Editor}">

          <nobr style="text-overflow:ellipsis;overflow-x:hidden;width:95%">

            <xsl:value-of select="@Editor" />

          </nobr>

        </td>

        <td width="15%" align="right" title="{substring(@Modified, 0, 11)}" style="padding-right:7px;">

          <nobr style="text-overflow:ellipsis;overflow-x:hidden;width:95%">

            <xsl:value-of select="substring(@Modified, 0, 11)" />

          </nobr>

        </td>

      </tr>

    <xsl:value-of select="$TableEnd" disable-output-escaping="yes"/>

  </xsl:template>


3.     결과 화면


Step 1: add a Content Query Web Part to the home page

This part is pretty basic.  I go to the home page of our site, click on Site Actions, and click Edit Page.  The page is checked out to me, and is placed in edit mode.  In one of the web part zones, I click "Add Web Part", scroll down to the Content Query Web Part, select it, and add it.

Now, I have a Content Query Web Part on my checked-out version of the home page.  It's running a default query that shows me all of the web pages in my site collection.

Step 2: configure Content Query to rollup product pages

Well, that's an OK query as a placeholder to show me that the web part is working correctly, but the results are not exactly what I want to show.  So, I have to edit the web part and configure it to show product pages.  First, I click on the web part menu and select Modify Shared Web Part.

The toolpane opens and I see sections of properties.  The Query section lets me configure what content the web part will show, and the Presentation lets me configure how the content is displayed.

Let's expand the Query section and configure this part:

  • For Source, I don't know (or care) where the product pages live, so I'll leave that set to the entire site collection.

  • For List Type, I know these are Web pages, which reside in a pages library, so I'll leave this set to Pages Library.

  • For Content Type, I know these are pages of a particular content type: Product Page. So, I'll pick the content type group that I created Product Page in, and then set the drop-down to Product Page.

Now, if I click Apply on my web part, I see just product pages appearing!

OK, but my tasks is to show the latest 5 product pages that are about the Widget product line.  Let's look further down the toolpane UI and see what we can do.

  • If I expose the Additional Filters drop-downs, I see the properties that are defined for the Product Page content type. Great; so if I select Product line, is equal to, and type in Widget, I should only get back those pages whose metadata says they're for the Widget product line.

  • Down on the Sorting drop-down, I see that we're sorting by created date (most recent first). I care about when people update product pages, so I'll set this to Modified.

  • Finally, I like to have an item limit here so the web part doesn't show too much information (it's the home page after all). I'll set the item limit to 5.

Now, if I click Apply on my web part, I see not only just product pages, but the latest 5 product pages about the Widget product line!

OK, we're getting close.  But...hmm, the styles don't look quite right.  I see a title, but I don't see the body text and the "more...".  How do we fix that?

Step 3: customize Content Query to ask for additional product page fields

Anytime you want the Content Query web part to show specific fields from the items that you're aggregating, you have to do two things:

  • You have to tell the web part to ask for those fields
  • You have to render those fields in the styles that the web part uses to show the items

Let's tackle the first one.  So, I want to have the web part show the Body field from the product pages, so I have to configure the web part to ask for it.

First, I export the web part that we've added.  From the web part menu, I select Export..., and pull down the .webpart file.  This is just a text file that shows all of the properties of the web part and their values.

We look for the property called "CommonViewFields".  This property makes the web part request additional fields, on top of the "base" ones it asks for out of the box.  We can edit this property and specify one additional field to ask for, namely the Body field.

<property name="CommonViewFields" type="string">Body_x0020_content, RichHTML</property>

There's a few ways you can configure this property but the most common one is "Internal name of field", followed by a comma, followed by the type of the field.  If you want more than one, add a semicolon between each pair.  (Don't worry, we have an SDK article coming soon that gets into all the details of using this and other properties.)

Now, all we have to do is save this .webpart file and import it back on the site.  By selecting Import from the toolpane, and browsing to the .webpart file, you can upload this new .webpart and then add it to your page.

As soon as we add our web part, we see...

Wow, that looks exactly the same!  Right, so the web part now has the Body field content, but it's not rendering the content.  How do I make the web part do that?

Step 4: customize XSLT to render additional fields

The Content Query web part utilizes XSLT to render its contents.  This means that I can edit the way the web part renders content and configure exactly what is shown and how it's shown.

If I edit the web part and look at the toolpane, I'll see a couple of drop-downs that relate to Styles.  These correspond to the Header and ItemStyle XSLT files that are located in the site collection's Style Library, which is in the root site.

I see that the web part is currently configured to use the "Image on left" style.  If we open the ItemStyle file, we'll see several xsl templates.  Each corresponds to an item style in the drop-down above.  The Image on left style looks like this:

    <xsl:template name="Default" match="*" mode="itemstyle">
        <xsl:variable name="SafeLinkUrl">
            <xsl:call-template name="OuterTemplate.GetSafeLink">
                <xsl:with-param name="UrlColumnName" select="'LinkUrl'"/>
            </xsl:call-template>
        </xsl:variable>

        <xsl:variable name="SafeImageUrl">
            <xsl:call-template name="OuterTemplate.GetSafeStaticUrl">
                <xsl:with-param name="UrlColumnName" select="'ImageUrl'"/>
            </xsl:call-template>
        </xsl:variable>

        <xsl:variable name="DisplayTitle">
            <xsl:call-template name="OuterTemplate.GetTitle">
                <xsl:with-param name="Title" select="@Title"/>
                <xsl:with-param name="UrlColumnName" select="'LinkUrl'"/>
            </xsl:call-template>
        </xsl:variable>

        <xsl:variable name="LinkTarget">
            <xsl:if test="@OpenInNewWindow = 'True'" >_blank</xsl:if>
        </xsl:variable>


        <div id="linkitem" class="item">
            <xsl:if test="string-length($SafeImageUrl) != 0">
                <div class="image-area-left">
                    <a href="{$SafeLinkUrl}" mce_href="{$SafeLinkUrl}" target="{$LinkTarget}">
                        <img class="image" src="{$SafeImageUrl}" mce_src="{$SafeImageUrl}" alt="{@ImageUrlAltText}" />
                    </a>
                </div>
            </xsl:if>

            <div class="link-item">
                   <xsl:call-template name="OuterTemplate.CallPresenceStatusIconTemplate"/>
                <a href="{$SafeLinkUrl}" mce_href="{$SafeLinkUrl}" target="{$LinkTarget}" title="{@LinkToolTip}">
                    <xsl:value-of select="$DisplayTitle"/>
                </a>
                <div class="description">
                    <xsl:value-of select="@Description" />
                </div>
            </div>
        </div>
    </xsl:template>

The style breaks down into two sections:

  • The first section (the part that begins with an "xsl:variable") processes the data, and ensures that it is properly formatted. Some of these functions called here ensure the styles can be shared between the Summary Links and the Content Query web parts. Other functions are there to ensure that the information passed to the XSLT doesn't contain improper markup that could render out as unescaped HTML.
  • The second section (the part that begins with a "div id") renders HTML and includes the data.

We see that this style renders an image, a title, and a description.  For the scenario above, all I have to do is change that description line:

                <div class="description">
                    <xsl:value-of select="@Description" />
                </div>

and make it show the Body content field:

                <div class="description">
                    <xsl:value-of select="@Body_x005F_x0020_content" />
                </div>

If I save the XSLT and reload the page with my web part, I see:

Hmm...I see HTML markup.  That's because we escape the content.  I don't want to stop escaping because I don't want the page's body styles to leak into the web part.  Instead, I can call a simple function to remove the markup tags.

First, I'll write a little recursive function to parse for and remove things in between "<" and ">", and I'll add that to my XSLT:

                <xsl:template name="removeMarkup">
                       <xsl:param name="string" />
                       <xsl:choose>
                       <xsl:when test="contains($string, '&lt;')">
                              <xsl:variable name="nextString">
                                     <xsl:call-template name="removeMarkup">
                                     <xsl:with-param name="string" select="substring-after($string, '&gt;')" />
                                     </xsl:call-template>
                             </xsl:variable>
                              <xsl:value-of select="concat(substring-before($string, '&lt;'), $nextString)" />
                       </xsl:when>
                       <xsl:otherwise>
                              <xsl:value-of select="$string" />
                      </xsl:otherwise>
                       </xsl:choose>
                </xsl:template>

Then, I'll replace my rendering of the "Body Content":

                <div class="description">
                    <xsl:value-of select="@Body_x005F_x0020_content" />
                </div>

by calling this function and displaying the results:

              <xsl:variable name="bodyContent">
                     <xsl:call-template name="removeMarkup">
                           <xsl:with-param name="string" select="@Body_x005F_x0020_content"/>
                     </xsl:call-template>
              </xsl:variable>

               <div class="description">
              <xsl:value-of select="$bodyContent"/>
              </div>

And now we get:

Great!  But, what about the (more) and the ellipsis?  Ah, a little more XSLT trickery will do this.  All I need to do is trim the Body on a set number of characters, then render a (more), and ensure it's linked to the article.  So I change:

               <div class="description">
              <xsl:value-of select="$bodyContent"/>
              </div>

To:

                <div class="description">
                <xsl:value-of select="substring($bodyContent,1,100)"/>
                 ...(
               <a href="{$SafeLinkUrl}" mce_href="{$SafeLinkUrl}" target="{$LinkTarget}" title="{@LinkToolTip}">
                 more
                </a>)
                </div>

If I save the XSLT and reload the page with my web part, I see:

Great, I'm finally done!

Tips and tricks

  • Often you may want to see how the cross-list query data is getting thrown to the XSLT, so you can devise the right statements to display the data.  Here's a quick way to render the names of the fields that are getting passed to you.  For a given item style that the web part is using, add the following markup:
                <xsl:for-each select="@*">
                       P:<xsl:value-of select="name()" />
                </xsl:for-each>
  • A quick sidenote on web part property editing: while exporting the web part as I did above is certainly valid, it only applies to one instance of a web part on one page.  You have two other options:
    • You can configure a Content Query web part as above, and have it be available in the web part gallery, for authors to add to their pages.
    • You can edit a web part on a web part page or page layout in SharePoint Designer, and configure it as above.  If you edit a web part in a web part zone in a page layout, then all new pages that use this layout will get your customized web part.
  • Pay attention to details when editing XSLTs.  Missing closed tags matter, as do letter casings when referring to field names.  I speak from experience here.


There is a fairly well known bug that prevents you from deleting both page layouts and master pages even though they are no longer in use. If you do try to delete either a page layout or master page you will receive the following error:

"This item cannot be deleted because it is still referenced by other pages. "

There is a workaround for this problem but it requires SharePoint designer. Here is my similar solution except that no SharePoint designer is required.
  1. Browse to the "Master Page Gallery".
  2. Select "Actions" and "Open with Windows Explorer"
  3. Right click on the white area and select "New" > "Folder"
  4. Drag the page layout or master page into the new folder
  5. Right click on the new folder and select "Delete"
  6. Confirm the box

SharePoint 2007 is the latest release of Microsoft's enterprise collaboration suite, which tightly integrates with the Microsoft Office Suite and allows organizations to establish well-managed corporate knowledge from the darkest depths of informational chaos. At least that's Microsoft unbiased opinion. In my experience, SharePoint 2007 is a major improvement over its predecessor, but it still takes a bit of know-how to make it work.

The latest rendition of SharePoint is built on top of ASP.NET 2.0, so ASP.NET developers should feel right at home developing against, and customizing, SharePoint 2007. In fact, some of the "latest technologies" in SharePoint, like Master Pages and Forms Authentication, are "not-quite-the-latest technologies" from ASP.NET. In this article, I'll cover some of the quirks to Forms Authentication that you will doubtless encounter when trying to set it up in SharePoint.

A step-by-step guide to configuring Forms authentication in SharePoint 2007

Following is a checklist for setting up Forms Authentication in SharePoint 2007

  1. Setup the membership data store
  2. Add a new user to the membership data store
  3. Configure SharePoint Central Administration web.config
  4. Configure the SharePoint site's web.config
  5. Enable Forms authentication on the SharePoint site
  6. Authorize the Forms-based user to access the site
  7. Login

In this article, we will be using the SQL Server membership provider to authenticate users, but you can use any membership provider that you so choose. The steps involved will be about same, but the specifics of those steps may change depending on your provider. I'm also assuming that you've already installed SharePoint and created the SharePoint site on which you're trying to enable forms authentication.

Step 1: Setup the membership data store

Before you can use the SQL Server membership provider, you have to set up the database that the provider uses to store member and role information. Microsoft ships a handy tool named the ASP.NET SQL Server Setup Wizard along with the .NET Framework, which will guide you through the process of creating the table structure and stored procedures required for the provider. You can launch the wizard by running aspnet_regsql.exe from the .NET Framework folder, which is normally found in the following location:

<WindowsDirectory>\Microsoft.NET\Framework\<version>\aspnet_regsql.exe
C:\Windows\Microsoft.NET\Framework\v2.0.50727\aspnet_regsql.exe

When you launch the wizard, the "Welcome" screen appears and tells you all sorts of useful things about what the wizard does and the command line parameters you can use to get more options. It makes for great reading. When you've satisfied your literary pallet, click the Next button to display the "Select a Setup Option" screen (Figure 1).

Figure 1 – ASP.NET SQL Server Setup Wizard – Select a Setup Option screen

From the "Select a Setup Option" screen, choose the "Configure SQL Server for application services" option button. This lets the wizard know you want to add new tables and stored procedures to a membership database. You can also use the wizard to remove the table structure and delete all data in the database, but we don't need to deal with that right now. If you accidentally add the structure to the wrong dataset, you may have to deal with it later. Click "Next" to move to the "Select the Server and Database" screen (Figure 2).

Figure 2 – ASP.NET SQL Server Setup Wizard – Select the Server and Database screen

Enter the name of your database server in the Server textbox to let the wizard know which SQL Server it needs to access. Then enter or select a database name in the Database combo box. The combo box displays a drop down containing a list of existing databases. If you want to add the tables and stored procedures for the provider to an existing database, select the database from the list. If you want to create a new database, then just type the name of the new database directly in the combo box and the wizard will create the database automatically. You may also need to enter SQL Server authentication credentials if you connect to the database using SQL Server authentication instead of Windows authentication. These credentials are not used outside of the wizard, so it won't affect your SharePoint configuration one way or the other. Click the Next button to continue to the "Confirm Your Settings" screen.

The "Confirm Your Settings" screen displays a summary of the epoch-defining choices you've made thus far in the wizard. In other words, the server and database name. If you're feeling hesitant about either, then this is your chance to back out. When you've got your courage built up, click the Next button.

In about a second, or about one and half seconds if you're using a Virtual PC image (like me), the wizard creates all of the tables and stored procedures required by the membership provider. If it takes longer than that, you've entered a setting incorrectly and the wizard is waiting to time out (or you have a really slow machine). The wizard then displays a final status screen indicating success or failure. If the wizard fails, it details the reasons why so you can fix the problem. There are only six settings in the entire wizard (if you count option buttons as "settings") so you should have a sporting chance at troubleshooting the problem. The success screen just tells you that everything worked and to click the Finish button.

At this point, the database you selected is populated with the proper table structure and stored procedures required by the provider, so now you can add a user to the membership database.

Step 2: Add a user to the membership data store

In IIS 7.0, there is a convenient "Add User" feature that uses the membership provider configured for the website to create a user. Unfortunately, IIS 7.0 isn't available for Windows Server 2003 so, in a production environment, you're probably stuck with IIS 6.0, which doesn't have a comparable add user feature. This makes adding users a bit tedious, but here's how you do it.

  1. Create a new ASP.NET web application
  2. Configure the new application for Forms authentication and point it at your newly-created membership database
  3. Copy the machine key element from your SharePoint site's Web.config into to your new web application
  4. Add users and roles using the ASP.NET Web Site Administration Tool (if you have Visual Studio 2005 handy) or create users via the CreateUserWizard ASP.NET control.

I'm assuming you know how to create a new web site, so I'm not delving into any of the specifics of step 1. Once you have the website created, add a new Web.config to the application root and add the following configuration setting to the file:

Listing 01 – Web.config for the User Creation Website

<?xml version="1.0"?>
<configuration xmlns="http://schemas.microsoft.com/.NetConfiguration/v2.0">
   <connectionStrings>
      <add name="MembershipDatabaseCNX" connectionString="SERVER=localhost;
DATABASE=MembershipDatabase; TRUSTED_CONNECTION=true;"/>

   </connectionStrings>
   <system.web>
      <machineKey
         validationKey="8E074B186056F889587355255B167DA297AD837E43FD9850"
         decryptionKey="991D4DEB57A2263855C31AA1D3FF4F1AD508A53D2A94658F"
validation="SHA1"
      />

      <authentication mode="Forms"/>
      <membership defaultProvider="DemoMembershipProvider">
         <providers>
            <add
               name="DemoMembershipProvider"
               type="System.Web.Security.SqlMembershipProvider,
System.Web, Version=2.0.0.0, Culture=neutral,
PublicKeyToken=b03f5f7f11d50a3a"
               connectionStringName="MembershipDatabaseCNX"
               enablePasswordRetrieval="false"
               enablePasswordReset="true"
               requiresQuestionAndAnswer="true"
               applicationName="/"
               requiresUniqueEmail="false"
               passwordFormat="Hashed"
               maxInvalidPasswordAttempts="5"
               minRequiredPasswordLength="7"
               minRequiredNonalphanumericCharacters="1"
               passwordAttemptWindow="10"
               passwordStrengthRegularExpression=""
            />
         </providers>
      </membership>
      <roleManager enabled="true" defaultProvider="DemoRoleProvider">
         <providers>
            <add
               name="DemoRoleProvider"
               connectionStringName="MembershipDatabaseCNX"
               applicationName="/"
               type="System.Web.Security.SqlRoleProvider, System.Web,
Version=2.0.0.0, Culture=neutral,
PublicKeyToken=b03f5f7f11d50a3a"
            />
         </providers>
      </roleManager>
   </system.web>
</configuration>

I've bolded a few areas of Listing 01 because you will need to modify them to work on your system:

  1. Replace the machineKey element from the listing with the machine key element in the Web.config from your SharePoint site. The machine key from the listing is the machineKey from my SharePoint site (on a VPC local to my box, so calm down you crazy Hax0rs) so it won't do you much good. The machineKey element changes from site to site, so make sure you get it from the site you want to configure for Forms authentication and not another site, or the SharePoint Central Administration site. You need matching machineKeys in the web application and the SharePoint site because user passwords are hashed (one way encrypted) and the hash routine uses the machine key value as part of the hashing algorithm.
  2. Make sure your connection string points at the appropriate server that houses the membership database you just created. Also make sure the appropriate credentials are supplied to the connection string.
  3. You can name your connection string anything you want, just make sure you use the same name later on in the connectionStrngName parameter for the membership and roleManager provider configurations.
  4. Make sure your applicationName parameters match in both the membership and roleManager provider configurations. The SqlMembershipProvider allows multiple applications to use the same membership database, so a mismatched name makes the provider think there are two applications instead of one and your members and roles won't associate correctly.
  5. Feel free to configure the password settings of the membership provider as you see fit.

Once you have the configuration settings in place for your web application, you need a way to add users. If you are using Visual Studio 2005, you can use the built-in Web Site Administration Tool:

  1. Click the Website menu and choose the ASP.NET Configuration menu item. This launches a new web browser window that displays the Web Site Administration Tool.
  2. Click on the Security tab or link.
  3. Click on the Create User link and create a new user. Remember the login information because you'll be needing it later.

If you do not have Visual Studio 2005, then you can use the CreateUserWizard control to add a new user to the membership database. It's not as nice as the Web Site Administration Tool interface, but it does get the job done. Create a new page named CreateUser.aspx and add the following markup to the file:

Listing 02 – CreateUser.aspx

<%@ Page Language="C#" %>
<!DOCTYPE html PUBLIC "-//W3C//DTD XHTML 1.0 Transitional//EN"
"http://www.w3.org/TR/xhtml1/DTD/xhtml1-transitional.dtd">
<html xmlns="http://www.w3.org/1999/xhtml" >
<head runat="server">
    <title>Create User Wizard</title>
</head>
<body>
    <form id="form1" runat="server">
        <asp:CreateUserWizard ID="CreateUserWizard1"
runat="server"></asp:CreateUserWizard>
    </form>
</body>
</html>

Once you save the file, navigate to the CreateUser.aspx page using your browser and create a new user. One way or another, you should have a user in the membership database at this point.

Step 3: Configure SharePoint Central Administration Web.config

Now that you have a user in the membership database, you've got to let SharePoint know that the user exists and grant the user access to your SharePoint site, which means configuring your site to use Forms authentication. You configure authentication through the SharePoint Central Administration web interface, but Central Administration needs to know about your membership and roleManager providers before that configuration can take place. That means you have to add the appropriate <connectionString>, <membership>, and <roleManager> configuration elements to the Central Administration Web.config. The configuration for Central Administration is almost identical to Listing 01, but this time around you do NOT set the defaultProvider attribute on the <membership> and <roleManager> elements, and do not set the enabled attribute on the <roleManager> element. Also, the Web.config for Central Administration already contains a great deal of configuration data, so make sure you do not accidentally remove or modify any existing settings.

Open the Central Administration's Web.config. If you do not know where this is located, use the IIS Manager to determine the home directory for Central Administration and open the Web.config from that directory.

Add the following configuration elements to the Central Administration's Web.config. Please note that some element, like <membership>, <connectionStrings>, and <roleManager>, may already exist in the Web.config. If they do, add the child elements to the existing item.

Listing 03 – Additions to the Central Administration Web.config

<?xml version="1.0"?>
<configuration xmlns=
"http://schemas.microsoft.com/.NetConfiguration/v2.0">
   ...
   <connectionStrings> <!-- element may already exist -->
      <add name="MembershipDatabaseCNX"
connectionString="SERVER=localhost;
DATABASE=MembershipDatabase;
TRUSTED_CONNECTION=true;"/>
   </connectionStrings>
   ...
   <system.web>
      ...
      <membership> <!-- element may already exist -->
         <providers> <!-- element may already exist -->
            <add
               name="DemoMembershipProvider"
               type="System.Web.Security.SqlMembershipProvider,
System.Web, Version=2.0.0.0, Culture=neutral,
PublicKeyToken=b03f5f7f11d50a3a"
               connectionStringName="MembershipDatabaseCNX"
               enablePasswordRetrieval="false"
               enablePasswordReset="true"
               requiresQuestionAndAnswer="true"
               applicationName="/"
               requiresUniqueEmail="false"
               passwordFormat="Hashed"
               maxInvalidPasswordAttempts="5"
               minRequiredPasswordLength="7"
               minRequiredNonalphanumericCharacters="1"
               passwordAttemptWindow="10"
               passwordStrengthRegularExpression=""
            />
         </providers>
      </membership>
      <roleManager> <!-- element may already exist -->
         <providers> <!-- element may already exist -->
            <add
               name="DemoRoleProvider"
               connectionStringName="MembershipDatabaseCNX"
               applicationName="/"
               type="System.Web.Security.SqlRoleProvider,
System.Web, Version=2.0.0.0, Culture=neutral,
PublicKeyToken=b03f5f7f11d50a3a"
            />
         </providers>
      </roleManager>
      ...
   </system.web>
   ...
</configuration>

Now the Central Administration knows about your provider configurations. You would think that having the information in the "SharePoint Central Administration" would be enough, but no. You've got to add it to the Web.config in your SharePoint site as well.

NOTE: Notice that Listing 03 never refers to the machineKey. Not even once. This is because you should not mess with the machineKey in SharePoint Central Administration. Leave it alone. Do not change it. Do not delete it. Your provider does not do any encrypting or hashing from the Central Administration, so you don't have to synchronize the machineKey between the two sites. If you change the machineKey in Central Administration, bad things could happen.

Step 4: Configure SharePoint Site Web.config

At this point, you should be tired of messing with configuration settings, but the end is near. Go ahead and open the Web.config in the root directory of your SharePoint site, and make the same changes that you made to the SharePoint Central Administration's Web.config. Use Listing 03 as your guide. When you are finished, you need to set the defaultProvider attributes in the <membership> and <roleManager> elements, and the enabled attribute in the <roleManager> element, as shown in Listing 04.

Listing 04 – Attributes that appear in the SharePoint site Web.config (but not in the Central Administration Web.config)

<?xml version="1.0"?>
<configuration xmlns=
"http://schemas.microsoft.com/.NetConfiguration/v2.0">
   ...
   <system.web>
      ...
      <membership defaultProvider="DemoMembershipProvider">
         ...

      </membership>
      <roleManager enabled="true" defaultProvider="DemoRoleProvider">

         ...
      </roleManager>
      ...
   </system.web>
   ...
</configuration>

Once you've entered the configuration settings, SharePoint Central Administration and your SharePoint site have the settings required to enable Forms authentication. Time to jump back to the SharePoint Central Administration site.

Step 5: Enable Forms Authentication on the SharePoint site

You enable Forms Authentication for SharePoint sites using SharePoint Central Administration. Navigate to the Central Admin site using your browser. You can normally find a shortcut to the site in the Start menu:

Programs > Office Server 2007 > SharePoint 3.0 Central Administration 

Once the Central Administration Home page is loaded, click on the Application Management link on the left hand navigation bar. You are taken to the Application Management page, which displays a variety of administration links. Click on the Authentication Providers link under the Application Security section on the right hand column of the page. The Authentication Providers page loads, as shown in Figure 3.

Figure 3 – Authentication Providers screen

When working in SharePoint Central Administration website, make sure the correct Web Application is selected when you are about to change configuration settings; otherwise you'll be applying changes to the wrong site. There's a small light-blue bar in the content pane of the page that displays the current Web Application URL. Make sure it's the web application on which you want to enable Forms authentication. If it's not, click the little down-arrow next to the URL and choose "Change Web Application" from the drop down list. SharePoint then displays a popup window with a list of web application from which you may choose.

Once you have the right web application selected, the Authentication Providers page displays a list of the zones in that application. Click on the name of the zone in which you want to enable Forms authentication. The Edit Authentication page displays (Figure 4).

Figure 4 – Edit Authentication Page

In the Edit Authentication page, choose the "Forms" option for Authentication Type. The page refreshes and displays the Membership provider and Role manager sections. Enter DemoMembershipProvider in the Membership provider name textbox, and DemoRoleProvider in the Role manager name textbox, then click the Save button. You are taken back to the Authentication Providers screen, but your zone should now say DemoMembershipProvider under the Membership Provider Name column. Forms authentication is now enabled on the site.

Step 6: Authorize the Forms-based user to access the site

Now that Forms authentication is enabled on the site, you can hit the site and see the login form (Figure 6). Microsoft spared no expense making this the blandest form you'll ever see. You will probably want to customize it so it looks a lot nicer. Maybe include some text about how the user should enter their username and password. Nobody will read it, but it definitely makes a login form look like a login form. Anyway, if you enter your username and password, you will be successfully authenticated and then promptly denied access because you have no authorization to be in the site. So, how do you get authorization? You have to use the Site Collection Administrator account.

You may remember setting up a Site Collection Administrator when you first created the site a while back, and it was almost certainly a Windows user account. If you extended the site and have both a Windows zone and a Forms authentication zone, then you can login to the Windows zone and setup the Forms user in Site Settings as you would any other user.

If you have not extended the site, then you've only got one zone and its using Forms authentication. As such, the Windows account associated with the site collection administrator is effectively useless and you need to change the site collection administrator over to a Forms based account. To do this, open SharePoint Central Administration and click on the Application Management link in the left navigation menu. When the Application Management page displays, click the Site Collection Administrators link under the SharePoint Site Management section in the left-hand column of the page. The Site Collection Administrators page displays (Figure 5).

Figure 5 – Site Collection Administrators Page

On the Site Collection Administrators page, make sure that correct site collection is selected. Then, enter the username of the user you created back in Step 2 in the Primary Site Collection Administrator textbox. Click on the Check Names icon (the little red guy with a check mark) next to the textbox. It may take a few seconds, but the page should underline the text in the textbox indicating that the username is valid. If the username is not valid, the page puts a red squiggly line under the username and informs you that the user was not found. If the user is not found, make sure you typed the name correctly. If the issue persists, go back and check your configuration settings to ensure the connection string is valid and there are no typos.

Click on the OK button to save the changes. Your Forms authentication account is now a Site Collection Administrator who has authorization to visit the site. You can use that account to get into the site and setup additional Forms authentication users in Site Settings.

Step 7: Login

When you access the site, you are presented with the previously-mentioned default SharePoint login page (Figure 6). Enter your username and password, and then click the Sign In button. You should be authenticated and authorized, and the site should display as you would expect.

Figure 6 – SharePoint Forms Authentication Login Page

Forms Authentication and the search crawler

If you are planning on using the searching capabilities of SharePoint, then you need to know one major obstacle with Forms authentication. The search crawler can only access zones configured for Windows authentication. If your crawler is pointed at the default zone, and then you change the default zone to use Forms authentication, then your search is going to break. To get around this issue, extend your web application and create a zone that uses Windows authentication, then point the crawler at the new zone. Even though the search is hitting a different zone, the search findings will be available in your Forms authentication zone.

Conclusion

Once you know how to do it, getting Forms authentication up and running on a SharePoint site is fairly easy. You still have a bit of work to do getting your security planned out and adding users and roles to the site, but that's the case with almost any SharePoint project. I would also highly recommend customizing the Forms login page since it's not much better looking out of the box than the browser based password dialog you're trying to avoid in the first place.


A user field in a list allows people to choose a user for each list item.


When looking at the value that is stored, we can see it is a lookup field - and is stored using the format ID#useraccount. For example:

listitem["User Name"] will have "1#development\ishai"
Click on the image below to see it in action in visual studio:


Where does this number come from? well, everytime you create a site in sharepoint, sharepoint creates a list for users. Each user gets an ID in the list, and when you add a user column to a list in that site, it is infact a special case of a lookup column into the users list. So in each site the same user will have a different ID.


So how do we use this field in code?

Get a user from a list item:


To get a user we use the SPFieldUserValue class, which accepts a SPWeb and a string value as parameters. The string value is the value from the list that contains the ID and the account name. Once we have that, we can use the SPFieldUserValue to get information about the user.

Example:


 using (SPSite site = new SPSite("http://portal"))

            {

                using (SPWeb web = site.OpenWeb())

                {

                    SPList list = web.Lists["Example For Users"];

                    SPListItem item = list.Items[0];


                    SPFieldUserValue userValue = new SPFieldUserValue(web, item["User Name"].ToString());

                    if (userValue.User.LoginName == web.CurrentUser.LoginName)

                    {

                        //do something!

                    }

                }

            }


Adding a value to a user field


This is the same, but in reverse. We use the same class (SPFieldUserValue ) and give it the values we want for the user.


using (SPSite site = new SPSite("http://portal"))

            {

                using (SPWeb web = site.OpenWeb())

                {

                    SPList list = web.Lists["Example For Users"];

                    SPListItem item = list.Items[0];


                    SPFieldUserValue userValue = new SPFieldUserValue(web, web.CurrentUser.ID, web.CurrentUser.LoginName);

                    item["User Name"] = userValue;

                    item.Update();

                }

            }


The image below shows the list after I updated the list item:


  1. stsadm -o activatefeature {-filename <relative path to Feature.xml> | -name <feature folder> | -id <feature Id>} [-url <url>] [-force]
  2. stsadm -o activateformtemplate -url <URL to the site collection> [-formid <form template ID>] [-filename <path to form template file>]

  3. stsadm -o addalternatedomain -url <protocol://existing.WebApplication.URLdomain> -incomingurl <protocol://incoming.url.domain> -urlzone <default, extranet, internet, intranet, custom> -resourcename <non-web application resource name>
  4. stsadm -o addcontentdb -url <url> -databasename <database name> [-databaseserver <database server name>] [-databaseuser <database username>] [-databasepassword <database password>] [-sitewarning <site warning count>] [-sitemax <site max count>]

  5. stsadm -o adddataconnectionfile -filename <path to file to add> [-webaccessible <bool>] [-overwrite <bool>] [-category <bool>]
  6. stsadm -o add-ecsfiletrustedlocation -Ssp <SSP name> -Location <URL|UNC> -LocationType SharePoint|Unc|Http -IncludeChildren True|False [-SessionTimeout <time in seconds>] [-ShortSessionTimeout <time in seconds>] [-MaxRequestDuration <time in seconds>] [-MaxWorkbookSize <file size in Mbytes>] [-MaxChartSize <size in Mbytes>] [-VolatileFunctionCacheLifetime <time in seconds>] [-DefaultWorkbookCalcMode File|Manual|Auto|AutoDataTables] [-AllowExternalData None|Dcl|DclAndEmbedded] [-WarnOnDataRefresh True|False] [-StopOpenOnRefreshFailure True|False] [-PeriodicCacheLifetime <time in seconds>] [-ManualCacheLifetime <time in seconds>] [-MaxConcurrentRequestsPerSession <number of requests>] [-AllowUdfs True|False] [-Description <descriptive text>]

  7. stsadm -o add-ecssafedataprovider -Ssp <SSP name> -ID <data provider id> -Type Oledb|Odbc|OdbcDsn [-Description <descriptive text>]
  8. stsadm -o add-ecstrusteddataconnectionlibrary -Ssp <SSP name> -Location <URL> [-Description <descriptive text>]

  9. stsadm -o add-ecsuserdefinedfunction -Ssp <SSP name> -Assembly <strong name|file path> -AssemblyLocation GAC|File [-Enable True|False] [-Description <descriptive text>]
  10. stsadm -o addexemptuseragent -name <user-agent to receive InfoPath files instead of a Web page>

  11. stsadm -o addpath -url <url> -type <explicitinclusion/wildcardinclusion>
  12. stsadm -o addpermissionpolicy -url <url> -userlogin <login name> -permissionlevel <permission policy level> [-zone <URL zone>] [-username <display name>]

  13. stsadm -o addsolution -filename <Solution filename> [-lcid <language>]
  14. stsadm -o addtemplate -filename <template filename> -title <template title> [-description <template description>]

  15. stsadm -o adduser -url <url> -userlogin <DOMAIN\user> -useremail <someone@example.com> -role <role name> / -group <group name> -username <display name> [-siteadmin]

  16. stsadm -o addwppack  -filename <Web Part Package filename> [-lcid <language>] [-url <url>] [-globalinstall] [-force] [-nodeploy]
  17. stsadm -o addwppack  -name <name of Web Part Package> [-lcid <language>] [-url <url>] [-globalinstall] [-force]

  18. stsadm -o addzoneurl -url <protocol://existing.WebApplication.URLdomain> -urlzone <default, extranet, internet, intranet, custom> -zonemappedurl <protocol://outgoing.url.domain> -resourcename <non-web application resource name>
  19. stsadm -o allowuserformwebserviceproxy -url <Url of the web application> -enable <true to enable, false to disable>

  20. stsadm -o allowwebserviceproxy -url <Url of the web application> -enable <true to enable, false to disable>
  21. stsadm -o associatewebapp -title <SSP name> [-default | -parent] -url <Web application 1 url,Web application 2 url> [-all]

  22. stsadm -o authentication -url <url> -type <windows/forms/websso> [-usebasic (valid only in windows authentication mode)] [-usewindowsintegrated (valid only in windows authentication mode)] [-exclusivelyusentlm (valid only in windows authentication mode)] [-membershipprovider <membership provider name>] [-rolemanager <role manager name>] [-enableclientintegration] [-allowanonymous]
  23. stsadm -o backup -url <url> -filename <filename> [-overwrite]

  24. stsadm -o backup -directory <UNC path> -backupmethod <full | differential> [-item <created path from tree>] [-percentage <integer between 1 and 100>] [-backupthreads <integer between 1 and 10>] [-showtree] [-quiet]

  25. stsadm -o backuphistory -directory <UNC path> [-backup] [-restore]
  26. stsadm -o binddrservice -servicename <data retrieval service name> -setting <data retrieval services setting>

  27. stsadm -o blockedfilelist -extension <extension> -add [-url <url>]
  28. stsadm -o blockedfilelist -extension <extension> -delete [-url <url>]

  29. stsadm -o canceldeployment -id <id>
  30. stsadm -o changepermissionpolicy -url <url> -userlogin <DOMAIN\name> [-zone <URL zone>] [-username <display name>] [{ -add | -delete } -permissionlevel <permission policy level>]

  31. stsadm -o copyappbincontent
  32. stsadm -o createadminvs [-admapidname <app pool name>] [-admapidtype <configurableid/NetworkService>] [-admapidlogin <DOMAIN\name>] [-admapidpwd <app pool password>]
  33. stsadm -o createcmsmigrationprofile -profilename <profile name> [-description <description>] [-connectionstring <connection string>] -databaseserver <server>  -databasename <name>  -databaseuser <username>  [-databasepassword <password>] [-auth windowsauth|sqlauth] -destination <url> [-rootchannel <channelname>] [-destinationlocale <LCID>] [-migrateresources onlyused|all] [-migrateacls yes|no] [-emailto <address1;address2>] [-emailon success|failure|none|both] [-keeptemporaryfiles Never|Always|Failure] [-enableeventreceivers yes|no]

  34. stsadm -o creategroup -url <url> -name <group name> -description <description> -ownerlogin <DOMAIN\name or group name> [-type member|visitor|owner]

  35. stsadm -o createsite -url <url> -owneremail <someone@example.com> [-ownerlogin <DOMAIN\name>] [-ownername <display name>] [-secondaryemail <someone@example.com>] [-secondarylogin <DOMAIN\name>] [-secondaryname <display name>] [-lcid <language>] [-sitetemplate <site template>] [-title <site title>] [-description <site description>] [-hostheaderwebapplicationurl <web application url>] [-quota <quota template>]

  36. stsadm -o createsiteinnewdb -url <url> -owneremail <someone@example.com> [-ownerlogin <DOMAIN\name>] [-ownername <display name>] [-secondaryemail <someone@example.com>] [-secondarylogin <DOMAIN\name>] [-secondaryname <display name>] [-lcid <language>] [-sitetemplate <site template>] [-title <site title>] [-description <site description>] [-hostheaderwebapplicationurl <web application url>] [-quota <quota template>] [-databaseuser <database username>] [-databasepassword <database password>] [-databaseserver <database server name>] [-databasename <database name>]

  37. stsadm -o createssp -title <SSP name> -url <Web application url> -mysiteurl <MySite Web application url> -ssplogin <username> -indexserver <index server> -indexlocation <index file path> [-ssppassword <password>] [-sspdatabaseserver <SSP database server>] [-sspdatabasename <SSP database name>] [-sspsqlauthlogin <SQL username>] [-sspsqlauthpassword <SQL password>] [-searchdatabaseserver <search database server>] [-searchdatabasename <search database name>] [-searchsqlauthlogin <SQL username>] [-searchsqlauthpassword <SQL password>] [-ssl <yes|no>]

  38. stsadm -o createweb -url <url> [-lcid <language>] [-sitetemplate <site template>] [-title <site title>] [-description <site description>] [-convert] [-unique]
  39. stsadm -o databaserepair -url <url> -databasename <database name> [-deletecorruption]

  40. stsadm -o deactivatefeature {-filename <relative path to Feature.xml> | -name <feature folder> | -id <feature Id>} [-url <url>] [-force]
  41. stsadm -o deactivateformtemplate -url <URL to the site collection> [-formid <form template ID>] [-filename <path to form template file>]

  42. stsadm -o deleteadminvs
  43. stsadm -o deletealternatedomain -url <ignored> -incomingurl <protocol://incoming.url.domain>
  44. stsadm -o deletecmsmigrationprofile -profilename <profile name>

  45. stsadm -o deleteconfigdb
  46. stsadm -o deletecontentdb -url <url> -databasename <database name> [-databaseserver <database server name>]
  47. stsadm -o deletegroup -url <url> -name <group name>

  48. stsadm -o deletepath -url <url>
  49. stsadm -o deletepermissionpolicy -url <url> -userlogin <login name> [-zone <URL zone>]

  50. stsadm -o deletesite -url <url> -deleteadaccounts <true/false>
  51. stsadm -o deletesolution -name <Solution name> [-override] [-lcid <language>]

  52. stsadm -o deletessp -title <SSP name> [-deletedatabases]
  53. stsadm -o deletessptimerjob -title <SSP Name> -jobid <SSP Timer Job Id>

  54. stsadm -o deletetemplate -title <template title> [-lcid <language>]
  55. stsadm -o deleteuser -url <url> -userlogin <DOMAIN\name> [-group <group>]

  56. stsadm -o deleteweb -url <url>
  57. stsadm -o deletewppack -name <name of Web Part Package> [-lcid <language>] [-url <url>]

  58. stsadm -o deletezoneurl -url <protocol://existing.WebApplication.URLdomain> -urlzone <default, extranet, internet, intranet, custom> -resourcename <non-web application resource name>
  59. stsadm -o deploysolution -name <Solution name> [-url <virtual server url>] [-allcontenturls] [-time <time to deploy at>] [-immediate] [-local] [-allowgacdeployment] [-allowcaspolicies] [-lcid <language>] [-force]

  60. stsadm -o deploywppack -name <Web Part Package name> [-url <virtual server url>] [-time <time to deploy at>] [-immediate] [-local] [-lcid <language>] [-globalinstall] [-force]
  61. stsadm -o disablessc -url <url>

  62. stsadm -o displaysolution -name <Solution name>
  63. stsadm -o editcmsmigrationprofile -profilename <profile name> [-description <description>] [-connectionstring <connection string>] [-databaseserver <server>] [-databasename <name>] [-databaseuser <username>] [-databasepassword <password>] [-auth sqlauth|windowsauth] [-emailto <address1;address2>] [-emailon success|failure|none|both] [-excludeschema ] [-keeptemporaryfiles Never|Always|Failure] [-enableeventreceivers yes|no]

  64. stsadm -o editcontentdeploymentpath -pathname <path name> [-keeptemporaryfiles Never|Always|Failure] [-enableeventreceivers yes|no] [-enablecompression yes|no]
  65. stsadm -o editssp -title <SSP name> [-newtitle <new SSP name>] [-sspadminsite <administration site url>] [-ssplogin <username>] [-ssppassword <password>] [-indexserver <index server>] [-indexlocation <index file path>] [-setaccounts <process accounts (domain\username)>] [-ssl <yes|no>]

  66. stsadm -o email -outsmtpserver <SMTP server> -fromaddress <someone@example.com> -replytoaddress <someone@example.com> -codepage <codepage> [-url <url>]

  67. stsadm -o enablecmsurlredirect -profilename <profile name> -off
  68. stsadm -o enablessc -url <url> [-requiresecondarycontact]
  69. stsadm -o enumalternatedomains -url <protocol://existing.WebApplication.URLdomain> -resourcename <non-web application resource name>

  70. stsadm -o enumcontentdbs -url <url>
  71. stsadm -o enumdataconnectionfiledependants -filename <filename for which to enumerate dependants>
  72. stsadm -o enumdataconnectionfiles [-mode <a | u | all | unreferenced>]

  73. stsadm -o enumdeployments
  74. stsadm -o enumexemptuseragents
  75. stsadm -o enumformtemplates
  76. stsadm -o enumgroups -url <url>
  77. stsadm -o enumroles -url <url>

  78. stsadm -o enumservices
  79. stsadm -o enumsites -url <virtual server url> -showlocks -redirectedsites
  80. stsadm -o enumsolutions
  81. stsadm -o enumssp -title <SSP name> [-default | -parent | -all]

  82. stsadm -o enumssptimerjobs -title <SSP Name>
  83. stsadm -o enumsubwebs -url <url>
  84. stsadm -o enumtemplates [-lcid <language>]

  85. stsadm -o enumusers -url <url>
  86. stsadm -o enumwppacks [-name <name of Web Part Package>] [-url <virtual server url>] [-farm]
  87. stsadm -o enumzoneurls -url <protocol://existing.WebApplication.URLdomain> -resourcename <non-web application resource name>

  88. stsadm -o execadmsvcjobs
  89. stsadm -o export -url <URL to be exported> -filename <export file name> [-overwrite] [-includeusersecurity] [-haltonwarning] [-haltonfatalerror] [-nologfile] [-versions <1-4> 1= Last major version for files and list items (default), 2= The current version, either the last major or the last minor, 3= Last major and last minor version for files and list items, 4= All versions for files and list items] [-cabsize <integer from 1-1024 megabytes> (default: 25)] [-nofilecompression] [-quiet]

  90. stsadm -o extendvs -url <url> -ownerlogin <domain\name> -owneremail <someone@example.com> [-exclusivelyusentlm] [-ownername <display name>] [-databaseuser <database user>] [-databaseserver <database server>] [-databasename <database name>] [-databasepassword <database user password>] [-lcid <language>] [-sitetemplate <site template>] [-donotcreatesite] [-description <iis web site name>] [-sethostheader] [-apidname <app pool name>] [-apidtype <configurableid/NetworkService>] [-apidlogin <DOMAIN\name>] [-apidpwd <app pool password>] [-allowanonymous]

  91. stsadm -o extendvsinwebfarm -url <url> -vsname <web application name> [-exclusivelyusentlm] [-apidname <app pool name>] [-apidtype <configurableid/NetworkService>] [-apidlogin <DOMAIN\name>] [-apidpwd <app pool password>] [-allowanonymous]

  92. stsadm -o forcedeleteweb -url <url>
  93. stsadm -o formtemplatequiescestatus [-formid <form template ID>] [-filename <path to form template file>]
  94. stsadm -o getadminport

  95. stsadm -o getdataconnectionfileproperty -filename <filename of the data connection file> -pn <property name>
  96. stsadm -o getformsserviceproperty -pn <option name>
  97. stsadm -o getformtemplateproperty [-formid <form template ID>] [-filename <path to form template file>] -pn <property name>

  98. stsadm -o getproperty -propertyname <property name> [-url <url>] (SharePoint cluster properties: avallowdownload, avcleaningenabled, avdownloadscanenabled, avnumberofthreads, avtimeout, avuploadscanenabled, command-line-upgrade-running, database-command-timeout, database-connection-timeout, data-retrieval-services-enabled, data-retrieval-services-oledb-providers, data-retrieval-services-response-size, data-retrieval-services-timeout, data-retrieval-services-update, data-source-controls-enabled, dead-site-auto-delete, dead-site-notify-after, dead-site-num-notifications, defaultcontentdb-password, defaultcontentdb-server, defaultcontentdb-user, delete-web-send-email, irmaddinsenabled, irmrmscertserver, irmrmsenabled, irmrmsusead, job-ceip-datacollection, job-config-refresh, job-database-statistics, job-dead-site-delete, job-usage-analysis, job-watson-trigger, large-file-chunk-size, token-timeout, workflow-cpu-throttle, workflow-eventdelivery-batchsize, workflow-eventdelivery-throttle, workflow-eventdelivery-timeout, workflow-timerjob-cpu-throttle, workitem-eventdelivery-batchsize, workitem-eventdelivery-throttle; SharePoint virtual server properties: alerts-enabled, alerts-limited, alerts-maximum, change-log-expiration-enabled, change-log-retention-period, data-retrieval-services-enabled, data-retrieval-services-inherit, data-retrieval-services-oledb-providers, data-retrieval-services-response-size, data-retrieval-services-timeout, data-retrieval-services-update, data-source-controls-enabled, days-to-show-new-icon, dead-site-auto-delete, dead-site-notify-after, dead-site-num-notifications, defaultquotatemplate, defaulttimezone, delete-web-send-email, job-change-log-expiration, job-dead-site-delete, job-diskquota-warning, job-immediate-alerts, job-recycle-bin-cleanup, job-usage-analysis, job-workflow, job-workflow-autoclean, job-workflow-failover, max-file-post-size, peoplepicker-activedirectorysearchtimeout, peoplepicker-distributionlistsearchdomains, peoplepicker-nowindowsaccountsfornonwindowsauthenticationmode, peoplepicker-onlysearchwithinsitecollection, peoplepicker-searchadcustomquery, peoplepicker-searchadforests, presenceenabled, recycle-bin-cleanup-enabled, recycle-bin-enabled, recycle-bin-retention-period, second-stage-recycle-bin-quota, send-ad-email)
  99. stsadm -o getsitedirectoryscanschedule
  100. stsadm -o getsitelock -url <url>

  101. stsadm -o geturlzone -url <protocol://incoming.url.domain>
  102. stsadm -o import -url <URL to import to> -filename <import file name> [-includeusersecurity] [-haltonwarning] [-haltonfatalerror] [-nologfile] [-updateversions <1-3> 1= Add new versions to the current file (default), 2= Overwrite the file and all its versions (delete then insert),3= Ignore the file if it exists on the destination] [-nofilecompression] [-quiet]

  103. stsadm -o installfeature {-filename <relative path to Feature.xml from system feature directory> | -name <feature folder>} [-force]
  104. stsadm -o listlogginglevels [-showhidden]
  105. stsadm -o listregisteredsecuritytrimmers -ssp <ssp name>

  106. stsadm -o localupgradestatus
  107. stsadm -o managepermissionpolicylevel -url <url> -name <permission policy level name> [{ -add | -delete }] [-description <description>] [-siteadmin <true | false>] [-siteauditor <true | false>] [-grantpermissions <comma-separated list of permissions>] [-denypermissions <comma-separated list of permissions>]

  108. stsadm -o migrateuser -oldlogin <DOMAIN\name> -newlogin <DOMAIN\name> [-ignoresidhistory]
  109. stsadm -o osearch [-action <list|start|stop>] required parameters for 'start' (if not  already set): role, farmcontactemail, service credentials [-f (suppress prompts)] [-role <Index|Query|IndexQuery>] [-farmcontactemail <email>] [-farmperformancelevel <Reduced|PartlyReduced|Maximum>] [-farmserviceaccount <DOMAIN\name> (service credentials)] [-farmservicepassword <password>] [-defaultindexlocation <directory>] [-propagationlocation <directory>]

  110. stsadm -o osearchdiacriticsensitive -ssp <ssp name> [-setstatus <True|False>] [-noreset] [-force]
  111. stsadm -o preparetomove {-ContentDB <DatabaseServer:DatabaseName> | -Site <URL>} [-OldContentDB <uniqueidentifier>] [-undo]

  112. stsadm -o profilechangelog -title <SSP Name> -daysofhistory <number of days> -generateanniversaries
  113. stsadm -o profiledeletehandler -type <Full Assembly Path>

  114. stsadm -o provisionservice -action <start/stop> -servicetype <servicetype (namespace or assembly qualified name if not SharePoint service)> [-servicename <servicename>]
  115. stsadm -o quiescefarm -maxduration <duration in minutes>

  116. stsadm -o quiescefarmstatus
  117. stsadm -o quiesceformtemplate [-formid <form template ID>] [-filename <path to form template file>] -maxduration <time in minutes>
  118. stsadm -o reconvertallformtemplates
  119. stsadm -o refreshdms -url <url>

  120. stsadm -o refreshsitedms -url <url>
  121. stsadm -o registersecuritytrimmer -ssp <ssp name> -id <0 - 2147483647> -typename <assembly qualified TypeName of ISecurityTrimmer implementation> -rulepath <crawl rule URL> [-configprops <name value pairs delimited by '~'>]

  122. stsadm -o registerwsswriter
  123. stsadm -o removedataconnectionfile -filename <filename to remove>
  124. stsadm -o removedrservice -servicename <data retrieval service name> -setting <data retrieval services setting>

  125. stsadm -o remove-ecsfiletrustedlocation -Ssp <SSP name> -Location <URL|UNC> -LocationType SharePoint|Unc|Http
  126. stsadm -o remove-ecssafedataprovider -Ssp <SSP name> -ID <data provider id> -Type Oledb|Odbc|OdbcDsn

  127. stsadm -o remove-ecstrusteddataconnectionlibrary -Ssp <SSP name> -Location <URL>
  128. stsadm -o remove-ecsuserdefinedfunction -Ssp <SSP name> -Assembly <strong name|file path> -AssemblyLocation GAC|File

  129. stsadm -o removeexemptuseragent -name <user-agent to receive InfoPath files instead of a Web page>
  130. stsadm -o removeformtemplate [-formid <form template ID>] [-filename <path to form template file>]
  131. stsadm -o removesolutiondeploymentlock [-server <server> [-allservers]

  132. stsadm -o renameserver -oldservername <oldServerName> -newservername <newServerName>
  133. stsadm -o renameweb -url <url> -newname <new subsite name>

  134. stsadm -o restore -url <url> -filename <filename> [-hostheaderwebapplicationurl <web application url>] [-overwrite]
  135. stsadm -o restore -directory <UNC path> -restoremethod <overwrite | new> [-backupid <Id from backuphistory, see stsadm -help backuphistory>] [-item <created path from tree>] [-percentage <integer between 1 and 100>] [-showtree] [-suppressprompt] [-username <username>] [-password <password>] [-newdatabaseserver <new database server name>] [-quiet]

  136. stsadm -o restoressp -title <SSP name> -url <Web application url> -ssplogin <username> -mysiteurl <MySite Web application url> -indexserver <index server> -indexlocation <index file path> [-keepindex] -sspdatabaseserver <SSP database server> -sspdatabasename <SSP database name> [-ssppassword <password>] [-sspsqlauthlogin <SQL username>] [-sspsqlauthpassword <SQL password>] [-searchdatabaseserver <search database server>] [-searchdatabasename <search database name>] [-searchsqlauthlogin <SQL username>] [-searchsqlauthpassword <SQL password>] [-ssl <yes|no>]

  137. stsadm -o retractsolution -name <Solution name> [-url <virtual server url>] [-allcontenturls] [-time <time to remove at>] [-immediate] [-local] [-lcid <language>]
  138. stsadm -o retractwppack -name <Web Part Package name> [-url <virtual server url>] [-time <time to retract at>] [-immediate] [-local] [-lcid <language>]

  139. stsadm -o runcmsmigrationprofile -profilename <profile name> [-skipanalyzer ] [-onlyanalyzer ] [-startover ] [-migratesincetime <DateTime string>] [-migrationfolder <path>] [-exportonly ] [-importonly ] [-htmldiff <path>]
  140. stsadm -o runcontentdeploymentjob -jobname <name> [-wait yes|no] [-deploysincetime <datetime>] (<datetime> as "MM/DD/YY HH:MM:SS")

  141. stsadm -o scanforfeatures [-solutionid <Id of Solution>] [-displayonly]
  142. stsadm -o setadminport -port <port> [-ssl] [-admapcreatenew] [-admapidname <app pool name>]

  143. stsadm -o setapppassword -password <password>
  144. stsadm -o setbulkworkflowtaskprocessingschedule -schedule <recurrence string>
  145. stsadm -o setconfigdb [-connect] -databaseserver <database server> [-databaseuser <database user>] [-databasepassword <database user password>] [-databasename <database name>] [-exclusivelyusentlm] [-farmuser] [-farmpassword] [-adcreation] [-addomain <Active Directory domain>] [-adou <Active Directory OU>]

  146. stsadm -o setcontentdeploymentjobschedule -jobname <name> -schedule <schedule> (Schedule Parameter Examples: "every 5 minutes between 0 and 59", "hourly between 0 and 59", "daily at 15:00:00", "weekly between Fri 22:00:00 and Sun 06:00:00", "monthly at 15 15:00:00", "yearly at Jan 1 15:00:00")
  147. stsadm -o setdataconnectionfileproperty -filename <filename of the data connection file> -pn <property name> -pv <property value>

  148. stsadm -o setdefaultssp -title <SSP name>
  149. stsadm -o set-ecsexternaldata -Ssp <SSP name> [-ConnectionLifetime <time in seconds>] [-UnattendedServiceAccountName <account name>] [-UnattendedServiceAccountPassword <account password>]

  150. stsadm -o set-ecsloadbalancing -Ssp <SSP name> [-Scheme WorkbookUrl|RoundRobin|Local] [-RetryInterval <time in seconds>]
  151. stsadm -o set-ecsmemoryutilization -Ssp <SSP name> [-MaxPrivateBytes <memory in MBytes>] [-MemoryCacheThreshold <percentage>] [-MaxUnusedObjectAge <time in minutes>]

  152. stsadm -o set-ecssecurity -Ssp <SSP name> [-FileAccessMethod UseImpersonation|UseFileAccessAccount] [-AccessModel Delegation|TrustedSubsystem] [-RequireEncryptedUserConnection False|True] [-AllowCrossDomainAccess True|False]
  153. stsadm -o set-ecssessionmanagement -Ssp <SSP name> [-MaxSessionsPerUser <number of sessions>]

  154. stsadm -o set-ecsworkbookcache -Ssp <SSP name> [-Location <local or UNC path>] [-MaxCacheSize <storage in Mbytes>] [-EnableCachingOfUnusedFiles True|False]
  155. stsadm -o setformsserviceproperty -pn <option name> -pv <option value>

  156. stsadm -o setformtemplateproperty [-formid <form template ID>] [-filename <path to form template file>] -pn <property name> -pv <property value>
  157. stsadm -o setholdschedule -schedule <recurrence string>

  158. stsadm -o setlogginglevel [-category < [CategoryName | Manager:CategoryName [;...]] >] {-default | -tracelevel  < None;  Unexpected; Monitorable; High; Medium; Verbose> [-windowslogginglevel < None;  ErrorServiceUnavailable;  ErrorSecurityBreach;  ErrorCritical;  Error;  Warning;  FailureAudit; SuccessAudit;  Information;  Success>] }

  159. stsadm -o setpolicyschedule -schedule <recurrence string>
  160. stsadm -o setproperty -propertyname <property name> -propertyvalue <property value> [-url <url>] (SharePoint cluster properties:, avallowdownload, avcleaningenabled, avdownloadscanenabled, avnumberofthreads, avtimeout, avuploadscanenabled, command-line-upgrade-running, database-command-timeout, database-connection-timeout, data-retrieval-services-enabled, data-retrieval-services-oledb-providers, data-retrieval-services-response-size, data-retrieval-services-timeout, data-retrieval-services-update, data-source-controls-enabled, dead-site-auto-delete, dead-site-notify-after, dead-site-num-notifications, defaultcontentdb-password, defaultcontentdb-server, defaultcontentdb-user, delete-web-send-email, irmaddinsenabled, irmrmscertserver, irmrmsenabled, irmrmsusead, job-ceip-datacollection, job-config-refresh, job-database-statistics, job-dead-site-delete, job-usage-analysis, job-watson-trigger, large-file-chunk-size, token-timeout, workflow-cpu-throttle, workflow-eventdelivery-batchsize, workflow-eventdelivery-throttle, workflow-eventdelivery-timeout, workflow-timerjob-cpu-throttle, workitem-eventdelivery-batchsize, workitem-eventdelivery-throttle; SharePoint virtual server properties:, alerts-enabled, alerts-limited, alerts-maximum, change-log-expiration-enabled, change-log-retention-period, data-retrieval-services-enabled, data-retrieval-services-inherit, data-retrieval-services-oledb-providers, data-retrieval-services-response-size, data-retrieval-services-timeout, data-retrieval-services-update, data-source-controls-enabled, days-to-show-new-icon, dead-site-auto-delete, dead-site-notify-after, dead-site-num-notifications, defaultquotatemplate, defaulttimezone, delete-web-send-email, job-change-log-expiration, job-dead-site-delete, job-diskquota-warning, job-immediate-alerts, job-recycle-bin-cleanup, job-usage-analysis, job-workflow, job-workflow-autoclean, job-workflow-failover, max-file-post-size, peoplepicker-activedirectorysearchtimeout, peoplepicker-distributionlistsearchdomains, peoplepicker-nowindowsaccountsfornonwindowsauthenticationmode, peoplepicker-onlysearchwithinsitecollection, peoplepicker-searchadcustomquery, peoplepicker-searchadforests, presenceenabled, recycle-bin-cleanup-enabled, recycle-bin-enabled, recycle-bin-retention-period, second-stage-recycle-bin-quota, send-ad-email)

  161. stsadm -o setrecordsrepositoryschedule -schedule <recurrence string>
  162. stsadm -o setsearchandprocessschedule -schedule <recurrence string>
  163. stsadm -o setsharedwebserviceauthn -ntlm | -negotiate

  164. stsadm -o setsitedirectoryscanschedule -schedule <recurrence string> (Schedule parameter examples: "every 5 minutes between 0 and 59", "hourly between 0 and 59", "daily at 15:00:00", "weekly between Fri 22:00:00 and Sun 06:00:00", "monthly at 15 15:00:00", "yearly at Jan 1 15:00:00")
  165. stsadm -o setsitelock -url <url> -lock <none | noadditions | readonly | noaccess>

  166. stsadm -o setsspport -httpport <HTTP port number> -httpsport <HTTPS port number>
  167. stsadm -o setworkflowconfig -url <url> {-emailtonopermissionparticipants <enable|disable> | -externalparticipants <enable|disable> | -userdefinedworkflows <enable|disable>}

  168. stsadm -o siteowner -url <url> [-ownerlogin <DOMAIN\name>] [-secondarylogin <DOMAIN\name>]
  169. stsadm -o spsearch [-action <list | start | stop | attachcontentdatabase | detachcontentdatabase | fullcrawlstart | fullcrawlstop>] [-f (suppress prompts)] [-farmperformancelevel <Reduced | PartlyReduced | Maximum>] [-farmserviceaccount <DOMAIN\name> (service credentials)] [-farmservicepassword <password>] [-farmcontentaccessaccount <DOMAIN\name>] [-farmcontentaccesspassword <password>] [-indexlocation <new index location>] [-databaseserver <server\instance> (default: josebda-moss)] [-databasename <database name> (default: SharePoint_WSS_Search)] [-sqlauthlogin <SQL authenticated database user>] [-sqlauthpassword <password>] -action list -action stop [-f (suppress prompts)] -action start -farmserviceaccount <DOMAIN\name> (service credentials) [-farmservicepassword <password>] -action attachcontentdatabase [-databaseserver <server\instance> (default: josebda-moss)] -databasename <content database name> [-searchserver <search server name> (default: josebda-moss)] -action detachcontentdatabase [-databaseserver <server\instance> (default: josebda-moss)] -databasename <content database name> [-f (suppress prompts)] -action fullcrawlstart -action fullcrawlstop

  170. stsadm -o spsearchdiacriticsensitive [-setstatus <True|False>] [-noreset] [-force]
  171. stsadm -o sync {-ExcludeWebApps <web applications> | -SyncTiming <schedule(M/H/D:value)> | -SweepTiming <schedule(M/H/D:value)> | -ListOldDatabases <days> | -DeleteOldDatabases <days>}

  172. stsadm -o syncsolution -name <Solution name>] [-lcid <language>] [-alllcids]
  173. stsadm -o syncsolution -allsolutions
  174. stsadm -o unextendvs -url <url> [-deletecontent] [-deleteiissites]

  175. stsadm -o uninstallfeature {-filename <relative path to Feature.xml> | -name <feature folder> | -id <feature Id>} [-force]
  176. stsadm -o unquiescefarm
  177. stsadm -o unquiesceformtemplate [-formid <form template ID>] [-filename <path to form template file>]

  178. stsadm -o unregistersecuritytrimmer -ssp <ssp name> -id <0 - 2147483647>
  179. stsadm -o unregisterwsswriter
  180. stsadm -o updateaccountpassword -userlogin <DOMAIN\name> -password <password> [-noadmin]

  181. stsadm -o updatealerttemplates -url <url> [-filename <filename>] [-lcid <language>
  182. stsadm -o updatefarmcredentials [-identitytype <configurableid/NetworkService>] [-userlogin <DOMAIN\name>] [-password <password>] [-local [-keyonly]]

  183. stsadm -o upgrade {-inplace | -sidebyside} [-url <url>] [-forceupgrade] [-quiet] [-farmuser <farm user>] [-farmpassword <farm user password>] [-reghost] [-sitelistpath <sites xml file>]
  184. stsadm -o upgradeformtemplate -filename <path to form template file> [-upgradetype <upgrade type>]

  185. stsadm -o upgradesolution -name <Solution name> -filename <upgrade filename> [-time <time to upgrade at>] [-immediate] [-local] [-allowgacdeployment] [-allowcaspolicies] [-lcid <language>]
  186. stsadm -o upgradetargetwebapplication -url <URL to upgrade> -relocationurl <new URL for non-upgraded content> -apidname <new app pool name> [-apidtype <configurableid/NetworkService>] [-apidlogin <DOMAIN\name>] [-apidpwd <app pool password>] [-exclusivelyusentlm]

  187. stsadm -o uploadformtemplate -filename <path to form template file>
  188. stsadm -o userrole -url <url> -userlogin <DOMAIN\name> -role <role name> [-add] [-delete]

  189. stsadm -o verifyformtemplate -filename <path to form template file>

+ Recent posts